Category: DIY

DIY Home Pest Control to Stay Bug Free

Having disgusting little critters in your home is no one’s idea of a great time. But it happens to be the reality for many homeowners and renters.

Dealing with bugs and rodents is sometimes overwhelming, especially when you’re not sure how to get rid of them and prevent their return.

The key to exceptional home pest control is a mix of offense and defense. So get your pen and paper and take notes while reading this guide!

Let’s begin with the defense.

Keep Your Kitchen Tidy

The number one room in the home pests love to attack is the kitchen. And why shouldn’t they? It’s where they can find all sorts of treats.

Just imagine, a little crumb to you is a large feast for an ant. So if you’re leaving small messes around your kitchen, then you can expect ants, roaches, and even mice to come around.

Your best bet is to sweep the entire kitchen and wipe all the counters/tables after each meal. Make sure all food containers and boxes are sealed. Then place whatever’s unsealed into the refrigerator.

It’s a good idea to invest in containers you can seal tightly, so no food goes to waste.

Dry Up All Water

Whether the water comes from spills, leaks or showers, make sure to dry it all up. Not doing so can breed all sorts of insects and cause them to multiply. Bugs love moist environments, like bathrooms, basements and beneath the kitchen sink.

Wipe the floors thoroughly after taking a bath or shower and mopping. If you have a leaky faucet or shower head, seek to replace it as soon as possible.

Another option is to use epoxy, clamps or waterproof tape to secure the leak until then.

Seal Up for the Best Home Pest Control

Insects are very clever in finding ways to enter into your home. While it may be impossible to find every entrance, there are some obvious ones you can take care of right away.

If you see any cracks or holes visible to the eye, then this is large enough for insects to come through. You can seal these areas with a weatherproof silicon caulking or flexible patching compound.

Focus on both interior and exterior fissures. You may notice many of them around the windows, doorways, roof, ceiling and where the wall meets the floor. Light switches may also have cracks requiring sealing.
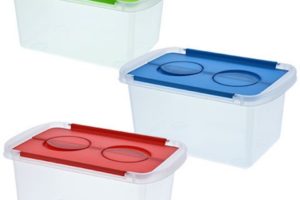
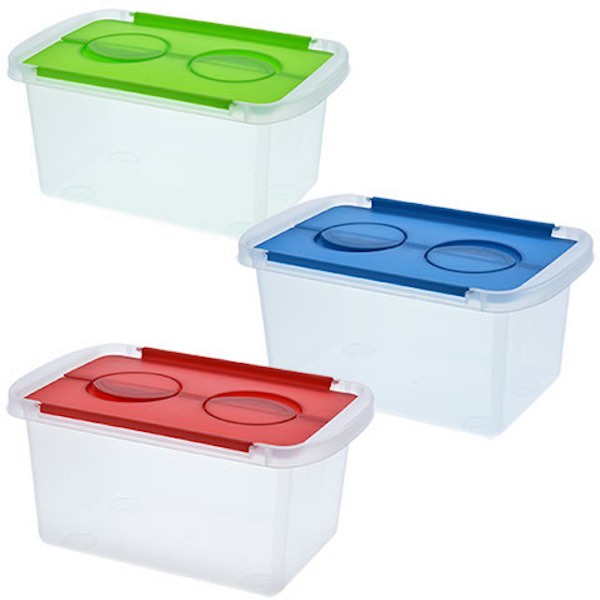
Declutter Your Home

Everyone has a little pack rat in them sometimes. This is why spring cleaning is so crucial. All year, we gather items, which leads to clutter throughout the home. And if you’re like most people, you end up tossing much of this junk inside of drawers, closets, the basement or attic.

But all you’re really doing is creating clutter that’ll attract all sorts of pests. So to avoid this, you should make it a habit to throw out items you no longer need. Then everything else, pack away neatly into tightly sealed containers.

Avoid using boxes to store possessions because they too attract insects and rodents.

Now, that you have some idea of what to do on the defense for your home pest control, it’s time for some offense.

Concoct a Garlic-Mint Insect Spray

There are natural remedies you can try to keep pests at bay. You can give this a try until you receive Go-Forth Pest Control service near Matthews, NC.

It’s perfect for outdoor locations, like your porch or deck. All you need are some garlic cloves and mint leaves. Blend them up using your food processor, then sprinkle in a little cayenne pepper and dishwashing liquid.

Boil it all together, then allow it to sit overnight. The next morning, strain it and put it into a spray bottle. Now, it’s ready for use.

Give Coffee Grounds a Try

This is another item you will likely find in your home. It’s the perfect pest repellent for ants. To them, coffee grounds are deadly. So if you have an ugly ant problem, sprinkle this around doors, windows and other entry points.

Borax and Sugar, Another Ant Killer

Here’s another interesting, yet surprising ant killer. It seems the sugar attracts the ants, then the borax kills them.

All you need is one cup of warm water, two tablespoons of Borax and 1/2 cup of sugar. Set it inside of a Petri dish type bowl and watch your pest problem dwindle.

Get Rid of Dust Mites with Oil

Dust mites are a common problem and there’s an easy and natural way to deal with it. You can create a repellent spray mixed with eucalyptus, clove, lavender, rosemary and peppermint oils. Place them in a spray bottle of water and mist it onto your bed every night.

Do so lightly, then allow it to air dry. These scents are detestable to dust mites but delightful to you!

Bring On the Spice with Hot Pepper Spray

Even insects have a hard time taking down spicy foods. You can use this to your advantage by creating a hot pepper spray. This is easily made at home using a gallon of water, three tablespoons of hot pepper flakes and 10 peppers chopped up finely.

Simmer this all together for 15 minutes, then allow it to sit for 24 hours. Then strain the leftovers and add a few drops of dish detergent. Now, you can spray the plants in your home garden.

Say Bye to Fruit Flies with Apple Cider Vinegar

There’s nothing worse than having to swat away flies as you’re enjoying a delicious slice of melon. Thankfully, you can get rid of these annoying critters with a bottle of apple cider vinegar.

What you need is a bottle or container with either a funnel or shaker shaped top. Fill the bottom with apple cider vinegar or plain vinegar, along with chopped apple pieces.

Something about this combination fruit flies simply can’t stand!

Learn More Life Hacks

At Thrifty Momma Ramblings, we have plenty of tips, tricks, and advice on all sorts of life hacks. So if you’re looking for more ways to amp up your home pest control or want to learn more about frugal living, then stop by our blog.

We are always updating our site with new content to educate our readers on how to save their hard-earned dollars.

Follow us today to stay updated on how to improve your life and retain your money at the same time!

5 DIY Garage Storage Ideas to Maximize Your Space

diy garage storageHaving a garage that is overrun with your belongings can be maddening. Plus, it makes it hard to locate certain items when you need them most.

The good thing is that you can fix this mess once and for good. With creative DIY garage storage ideas, you can add extra spaces, hooks, and cabinets to arrange your stuff and get everything organized.

In this post, we’re going to share some creative ways to boost your garage storage space.

Read on to learn more.

1. Think About a Shelving System

Do you have large empty walls in your garage? If so, you can get traditional shelving system to declutter your space. Simply assemble the unit and bolt it securely to the wall. You can then use tubs to organize items separately for easy identification.

Some traditional shelving units can hold everything from gardening equipment to bikes. You also make your own solution that best suits your storage needs. When using storage containers with your shelving system, remember to use clear labels to make everything convenient and accessible.

2. DIY Storage Cabinets

In some cases, you don’t need to cough up hundreds of dollars to acquire a brand new cabinet. A simple budget of about $100 to $500 is enough to help you make your own.

This can be just a simple project that will need materials, such as plywood, shelving cleats, trim fasteners, lag screws, and pulls. Some of these materials you can get from old and unused items in your home. Garage storage cabinets are ideal for sporting equipment and gardening tools.

3. Overhead Garage Storage

Overhead storage will work well if you have exposed rafters. You’ll need to install strong material on top of them.

The choice of material will depend on what you want to store up there. Improper placement of these storage solutions could affect your door’s operation thus you might need a garage door repair.

Alternatively, you can just buy and install overhead ceiling-mounted storage racks and systems. These options allow you to get things off your floor. So, you can park your car easily while still creating more room for storage. Keep in mind that you can also use the racks to hold your bikes.

4. Use Bins and Clear Containers

Don’t throw away bins and containers after using products that you bought. Instead, use them to store all those smaller items. For example, they can be great for toy trucks, squirt guns, chalk, and jump ropes.

You can find a convenient place to keep these containers and bins. If you have shelves, that can work well with this DIY garage storage idea. But you can also consider the underside of your shelves. Some people may also consider fastening the bins permanently to the shelves.

5. Use Bungee Cords

Help your kids store their balls and toys easily with bungee chords. Plus, you can also use them to hold other items securely to the wall. This is more creative than using bins to hold the balls.

You can also fasten a single cord to the wall to make simple tool holder. In this case, you’ll need to pin an elastic cord to the wall on both ends. Then, pin it after every 3 inches.

DIY Garage Storage

Keeping your garage neat and organized will allow for you to easily locate the items you need every time. You’ll also get more space for other items.

With these DIY garage storage ideas, you can turn your cluttered garage into something you’ll love. Most of these ideas are not costly to implement. You can simply use materials, such as wood, plywood, and bins, that are already in your home.

Do you have any thoughts on garage storage? Let us know in the comments.

Be Like Bob Vila: 5 Amazing Home Improvement Blog Ideas

home improvement blogRunning a home improvement blog is really hot right now. People are turning to DIY and home improving today. However, trends are changing really fast and decorating is turning into an expensive hobby. So, these people need resources. They need experts to guide them.

Whether it is a home improvement post or a DIY tutorial for a cool coffee table, your readers will just love it. Really, anything can work, and we are here to help you with your inspiration.

Here are five home improvement blog ideas you need to read now to express yourself or even make some extra money online:

1. Furniture Hacking – DIY Blog

When IKEA, among other inexpensive brands, became a worldwide phenomenon, people were not happy with the idea that everybody owned the stuff they had given money to get.

As a result, they started enhancing their furniture using a bunch of different materials.

Blogs about hacking your furniture turned into a huge sensation, so why not make one yourself? Just make sure that you have original ideas and get your creative juices flowing.

There is a lot of competition out there! IKEA hackers is a great example.

2. Remodeling Blog

Vintage has always been in fashion. So it comes as no surprise there is still a huge demand for blogs about taking old furniture to the next level. A blog about remodeling is always relevant!

However, just keep in mind that you need to find really great, old stuff and monitor their transformation through photos or video including a step by step guide.

You don’t just have to inspire your audience but also guide it. Do not get confused, though. There is a difference between hacking and remodeling. Hacking has to do mostly with new furniture. Remodeling is mainly about vintage items.

Also, remodeling is not just about vintage furniture. Even an article about a drywall access panel replacement could be considered as a “remodeling blog post.” Just be creative!

3. Home-Tour Blog

Who doesn’t love a peek into someone’s personal space? Let’s be completely honest. Everybody loves a secret look into an inspiring place that will help them get a couple of ideas about their new apartment.

Get yourself a good photo camera, take great shots of apartments that might offer some great inspiration and create your blog.

If you want to, you can always narrow the topic and make it more niche-y. Just tour your audience around living rooms or bedrooms instead of full homes.

4. Tiny Homes Blog

“Tiny Homes” is a huge niche these days. And we mean HUGE. People, nowadays, tend to move to smaller places either to save money or just because they realize how little they actually need to feel happy with their surroundings.

Just feature some beautiful tiny places and give advice to people who want to live in one too.

Special Tip: Japan and China are two great places to look for inspiring tiny homes.

5. Or a General Home Improvement Blog

Okay, you can always follow the experts’ path and go for a blog that includes all the different areas this topic can cover. You can write tutorials, showcase home-tours, mention all the latest trends. You can do anything that you want to do, really!

But you have to be careful. If you make your blog too general and make people believe you are the number one resource, you have to meet the standards you set for yourself. And these standards need both tons of work and quality content.

The good news is that ThriftyMomma can make life much easier for you. Sign-up for free and prepare for some serious blogging tips.

How to Redecorate Your Kitchen Like an Interior Stylist

interior stylistNo one has to prepare meals for the household in style. Let’s be honest, though: Everyone would probably feel better about food prep if they could do it in style.

Many people don’t have the funds to pay an interior stylist whenever they get bored with their kitchen design.

Luckily for them, they don’t have to. There are plenty of budget-friendly ways to redecorate kitchens, none of which have to involve professional stylists.

Curious what some of these are? Stay tuned to find out.

Updating Countertops

Whenever people think about redecorating their kitchens, they likely think of big changes. Their instinct is to get new appliances and counters.

Fortunately, homeowners don’t have to replace their old counters to get a fresh look. Updating their countertops should suffice in many cases.

The best thing about updating countertops is that there are so many options. From modern to rustic designs, there is a countertop design for everyone.

Regardless of which design homeowners settle on, they’ll enjoy preparing afternoon snacks for the family a lot more from there on out.

Painting Walls

Believe it or not, painting kitchen walls a new color can make a huge difference. A new color can completely change the vibe of the room.

While several people hire professionals, there is nothing wrong with painting walls without the help of the pros.

People who do it themselves should just make sure that they read up on painting like a pro. Doing that research should help things run more smoothly.

Put Some Jars On Display

Anyone who has used jars to store foods knows that jars are surprisingly stylish additions to homes. Cobb salads in jars can add lots of color to fridges, and granola which has been placed in jars can add nice brown hues to kitchen environments.

That said, why not take advantage of the food which has been placed in jars. All a homeowner has to do is get some shelves for the walls and place the jars on them. They can even play around with the idea of putting specific foods in their collection of jars to make the collection a bit more appealing.

Whoever said that people shouldn’t play with their food is clearly wrong.

Try A Window Seat

A kitchen with a nice, big window is a dream. The window allows natural light to pour into the space, giving the kitchen a wonderful glow. Enjoying this light from afar is great, but enjoying it up close is even better.

Which is why homeowners should consider adding window seats or benches.

Of course, this won’t work for everyone. If a family got replacement windows in the Bay Area to capitalize on the sunlight, that would be a wise investment.

if a family in a place which didn’t get much sunlight did the same thing in their kitchen? Not as great of an investment.

Awaken The Interior Stylist Within

No, not everyone can decorate a home like an interior stylist. Despite that fact, people are still capable of transforming their kitchens by making small tweaks.

Having said that, thrifty mommas, tweak away. A kitchen is, after all, where families meet after a long day comes to an end. And why shouldn’t families dine together in style?

5 Amazing Sugar Free Ice Cream Recipes for Summer

sugar free ice cream recipesAlthough frozen desserts have existed since the second century, the road to modern ice cream was a rocky one (pun intended). Ice cream was first tasted by the public in 1660. Before then, it’d been a specialty on royal and noble tables alike.

The popularity of this cold treat exploded and remains popular to this day. But store-bought ice cream has two problems. Not only is it high in sugar and other unhealthy ingredients, but it’s expensive.

The solution? Make your own ice cream from home with sugar free ice cream recipes. Keep reading to learn how.

Sugar Free Ice Cream Recipes

Whether a chocolate fiend, a vanilla fan, looking for something fruity, minty, or a coffee aficionado, there’s a low carb ice cream recipe here to suit all of these preferences. They’re also great for those who love save money on groceries since many ingredients are household staples.

Sugar Free Vanilla

For this basic and delicious flavor without all the sugar, you’ll need the following ingredients:

  • Whole milk (1 cup)
  • Sugar substitute such as Splenda or natural stevia sweetener (3/4 cup)
  • Kosher salt (just a pinch)
  • Heavy cream (2 cups)
  • Vanilla extract (1 to 2 teaspoons)

Once you have all of your ingredients, combine the milk, salt, and sugar substitute. You can use a whisk or a hand mixer. Keep mixing until the sugar substitute is dissolved.

Next, add the heavy cream and vanilla extract, and stir. Cover the bowl and stick it in the refrigerator for at least an hour. You can keep it in there as long as overnight.

The next day, use your ice cream maker to thicken the mixture. This will take about a half hour or so.

Dairy-Free Mint Chocolate Chip

If you love mint chocolate chip ice cream, but dairy doesn’t love you, don’t despair. Make this recipe instead. You’ll need these ingredients:

  • Full-fat coconut milk (15 ounces)–Chill it first.
  • Non-dairy milk (1/2 cup)
  • Vanilla extract (2 teaspoons)
  • Peppermint extract (1/4 teaspoon)
  • Honey (3 tablespoons)
  • Fresh spinach (1 cup)
  • Unsweetened chocolate (2 tablespoons)–Chop it.

Blend everything but the chocolate chip for about a minute, until the mixture is smooth. Churn the mixture in your ice cream maker for about 15 minutes. Toss in the chocolate and churn for another five.

Chocolate

Does it get any better than low-carb chocolate ice cream? If not, make sure you have these ingredients:

  • Heavy cream (2 cups)
  • Unsweetened cashew, almond, or coconut milk (1 1/2 cups)–Divide it.
  • Cocoa powder (1/2 cup)
  • Sugar substitute (1/2 cup)
  • Egg yolks (4)
  • Unsweetened chocolate (3 ounces)–Chop it.
  • Vanilla extract (1/2 teaspoon)
  • Liquid stevia extract (1/4 teaspoon)

Start out by making an ice bath. Let that sit while you combine the cream, 1 cup of the milk alternative, cocoa powder, and sugar substitute. Use medium heat while you whisk them together.

Whisk the egg yolks in a separate bowl, adding 1 cup of the hot cream mixture. Keep whisking as you do this in order to keep the yolks from scrambling. Add them back into the saucepan–keep whisking!

Keep cooking until the mixture can coat a spoon.

Add the chocolate and let it sit for five minutes before whisking until the mixture is smooth. Then, set the mixture over the ice bath for ten minutes before refrigerating it, covered, for no less than three hours.

Whisk in the rest of the milk substitute, vanilla, and stevia. Pour the whole mixture into your ice cream maker and churn.

Lemon Curd

Another one of our low-carb sugar free ice cream recipes is perfect for citrus lovers. If you like lemon, you’ll love this recipe. Here’s what you need for the lemon curd:

  • Large eggs (3)
  • Large egg yolks (3)
  • Sugar substitute (1/3 cup)
  • Lemon juice (1/4 cup)–Squeeze it fresh if you can.
  • Lemon zest (1 tablespoon)
  • Butter (6 tablespoons)–Cut it up into pieces.

For the ice cream, you’ll need:

  • Heavy whipping cream (1 3/4 cups)
  • Powered sugar substitute (1/4 cup)

To make the curd, begin by whisking the eggs, yolks, and sugar substitute. Add the lemon juice and zest. Hold the mixture over a pan of simmering water, but don’t let water touch the bowl.

Keep whisking for up to ten minutes or until the mixture thickens. Take it off the heat and add the butter. Let it stand a moment and then whisk the mixture again until it’s smooth.

Cover and chill, for at least three hours.

Meanwhile, make the ice cream by whisking the whipping cream, sugar substitute, and lemon curd. Churn this mixture and you can begin to enjoy your ice cream!

Coffee

If you love the flavor of coffee, you’ll love this no-churn recipe. Here’s what you’ll need:

  • Heavy cream (2 1/2 cups, divided)
  • Unsweetened almond milk (1 cup)
  • Powdered sugar substitute (1/2 cup)
  • Butter (1 tablespoon)
  • Xanthan gum (1/4 teaspoon)
  • Instant coffee (1 1/2 tablespoons)
  • Vanila extract (1/4 teaspoon)
  • Liquid stevia extract (1/4 teaspoon)

Mix together 1 cup of cream and almond milk over medium heat. Bring the mixture to a boil and then reduce the heat and simmer, stirring often. Keep at it for one hour to 90 minutes, until the mixture is reduced by half.

Take the mixture off the heat and add the powdered sweetener and butter, whisking until the mixture is smooth. Add in the xanthan gum, instant coffee, vanilla and stevia extracts. Keep stirring until the coffee grounds dissolve.

Cool the mixture. With the remaining cream, whip it until it forms peaks. Fold in the milk mixture and keep whisking until everything is combined.

Freeze the mixture for five to six hours.

Serve It Up

Scoop these flavors into a bowl or mix them together for a cool treat to beat the heat.

Which flavor is your favorite? How do you satisfy your sweet tooth in a low-carb way? Share your choice in the comments section below.

5 DIY Ways to Save A Trip to the Groomer

groomer

When you own a dog, you’ll do anything to make sure that your furry friend is comfortable and happy. Trips to the vet and even the pet supply store are needed, and even new foods or dog probiotics aren’t out the question. but there’s one expense you should be able to cut out of your budget.

Getting Rid Of the Groomer

Dog grooming has become an essential for some people, but when you get the bill at the end of the session you may regret your choice. On average it can cost $65 to get your dog fully groomed, and that cost can add up after awhile.

Let’s face it you’re going to have to make multiple trips to the groomer to keep your dogs clean. It would be much cheaper for you to learn some basic grooming tips, so you can care for your dog at home. Once you find the right schedule, you’ll easily be able to settle into a grooming routine for your dog.

Are you ready to have a clean and happy pooch without breaking the bank? If you follow these tips your fellow pet lovers are going to be asking you what your grooming secret is!

Use Flea Combs For Long Hair Breeds

Flea combs have very fine and close together teeth so they can easily pick out fleas and their eggs. They’re great for pest maintenance, but they can also help when you groom longer haired breeds.

Schnauzers, Shih Tzus, and most doodles have long sensitive hair on their face. A flea comb can be easily used to detangle and style their hair without causing discomfort. It can also help keep down the amount of shedded hair in your carpets.

Trim The Paw Hair

Do you feel like your dog is always tracking in dirt from the outside? Your dog may not be messy, their paw hair could be getting in the way.

Paws are important for dogs, and they can easily be neglected when they’re being groomed. When you’re grooming your dog, make sure you trim the hair around their paw pads. This can help prevent tracking in dirt and mud, and could even help give your dog more traction on slippery floors.

Burn Off Energy

Do you dread the idea of grooming your dog since you can’t imagine keeping them still? If you have a high energy dog, taking them to the park before a grooming session can help.

A lot of dogs don’t actually mind the groomer or the grooming itself, they just don’t like having to be still! Get your dog some exercise before you groom and you’ll be happy.

Don’t Forget Nails

When most people think about dog grooming they think about fur, but their nails need maintenance too. Overgrown nails could hurt their paws and will just be a nuisance to them.

Carefully trim their claws when you’re grooming them to help protect their paws. Also be sure to use dog nail clippers and not clippers for humans.

Rinse Twice

Shampoos and products can be great for keeping your dog’s coat shiny and clean, but residue from them can irritate your dog’s skin. Leftover product can cause dryness, flakes, or even itchiness. That’s why it’s important to rinse more than once after your shampoo.

Did we miss your favorite DIY grooming tip? Tell our readers about it in our comments section!