DIY – A Vintage Planter Cacti Garden!
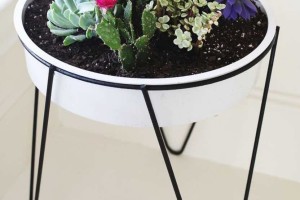
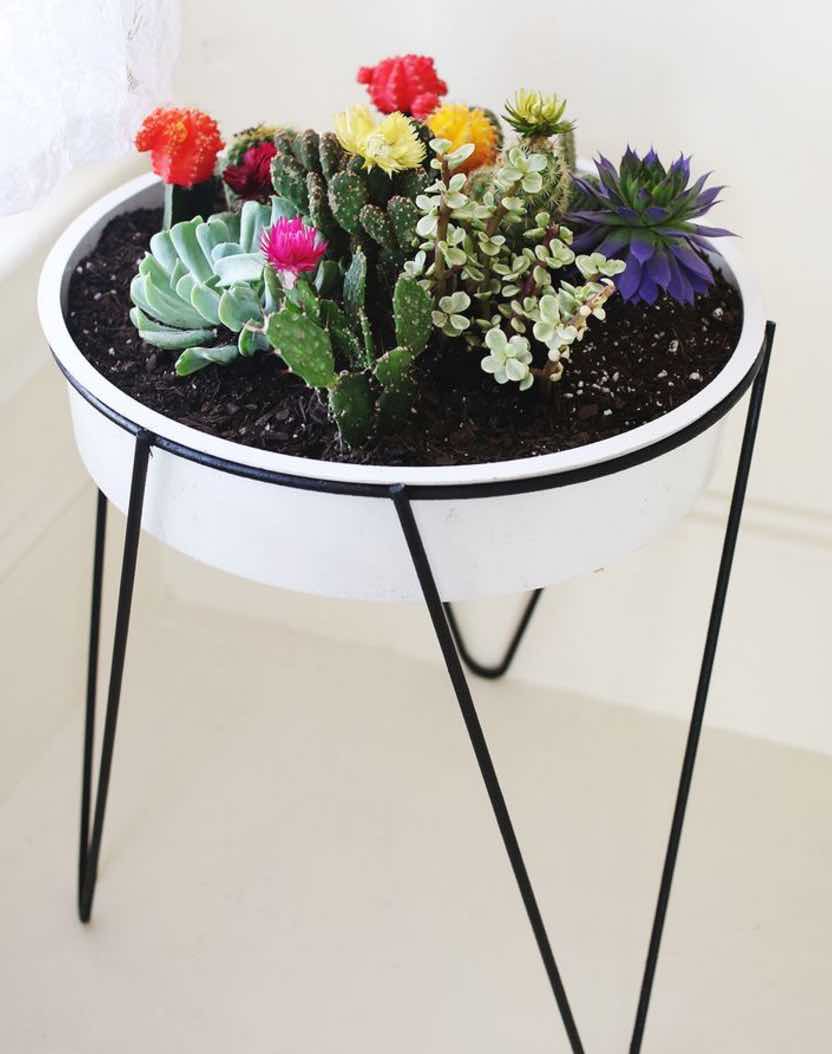
DIY – A Vintage Planter Cacti Garden!
Do you have any succulents in your house? How do you arrange them? 🙂
DIY – A Vintage Planter Cacti Garden!
Do you have any succulents in your house? How do you arrange them? 🙂

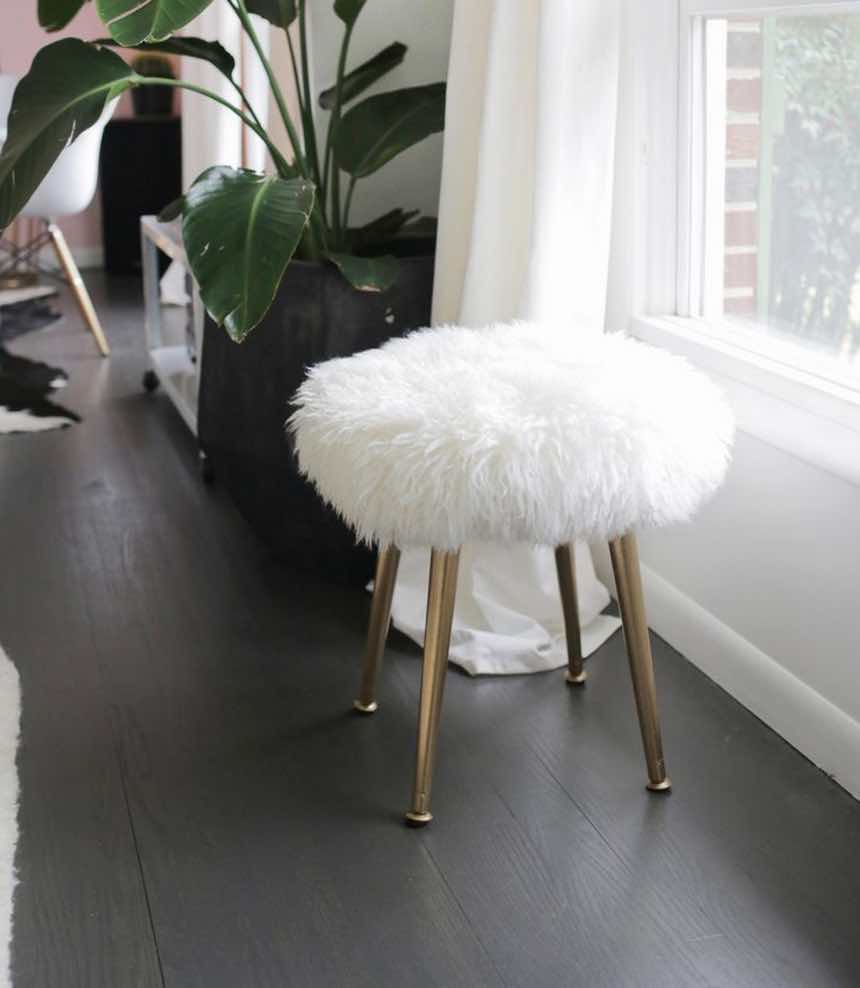
MAKE A FURRY STOOL (WITH GOLD LEGS) IN MINUTES!!
It’s INSANE how easy this stool is! And could save you so much money.
Supplies:
– round 15″ wood board
– gold spray paint
– midcentury 16″ legs (4)
– angled leg plates (4)
– furry material
– staple gun and long staples
Head over to A Beautiful Mess to see the next steps.
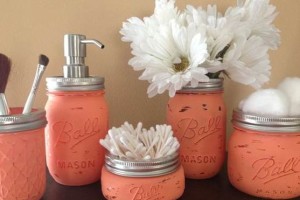
One of my most favorite thing in life is mason jars. I store everything in them and decorate with them every chance I get. I love the look of distressed paint on the mason jars. These painted jars will make the CUTEST Spring look in your home! Below are just a few ideas that you can do with painted mason jars, and the instructions you need to achieve this look are further in the post. Scroll down, and enjoy!
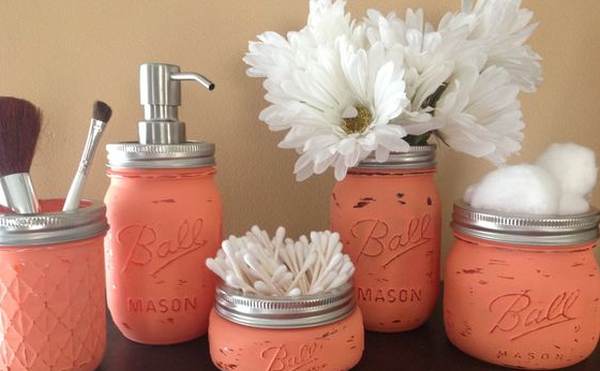
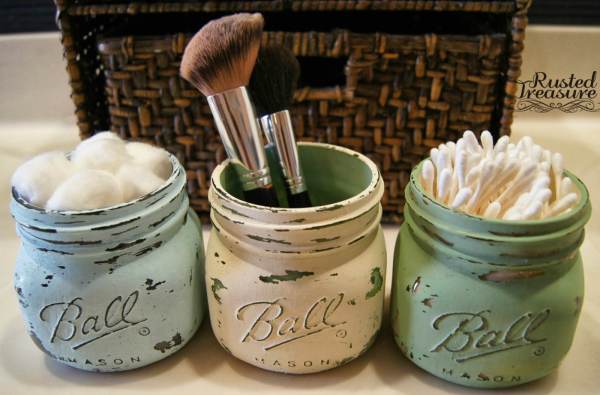
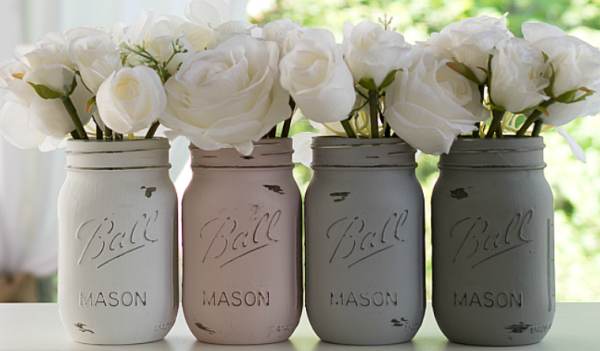
Thanks for the instructions, ItallStartedWiththePaint!


Star Wars Cupcakes Recipe! Use the Force!
Calling all Star Wars fans! We have an adorable Star Wars Cupcakes recipe, which would be fun to make at any occasion! My family made these cupcakes last weekend and had a blast! Ours did not look as pretty as those pictured above, however, we had lots of fun! If you have young children or are a Star Wars fan yourself, then you must try and make this treat! Ingredients:
Let us know what you thought about your cupcakes and how they turned out! For additional details on how to make this Star Wars themed treat, click here!
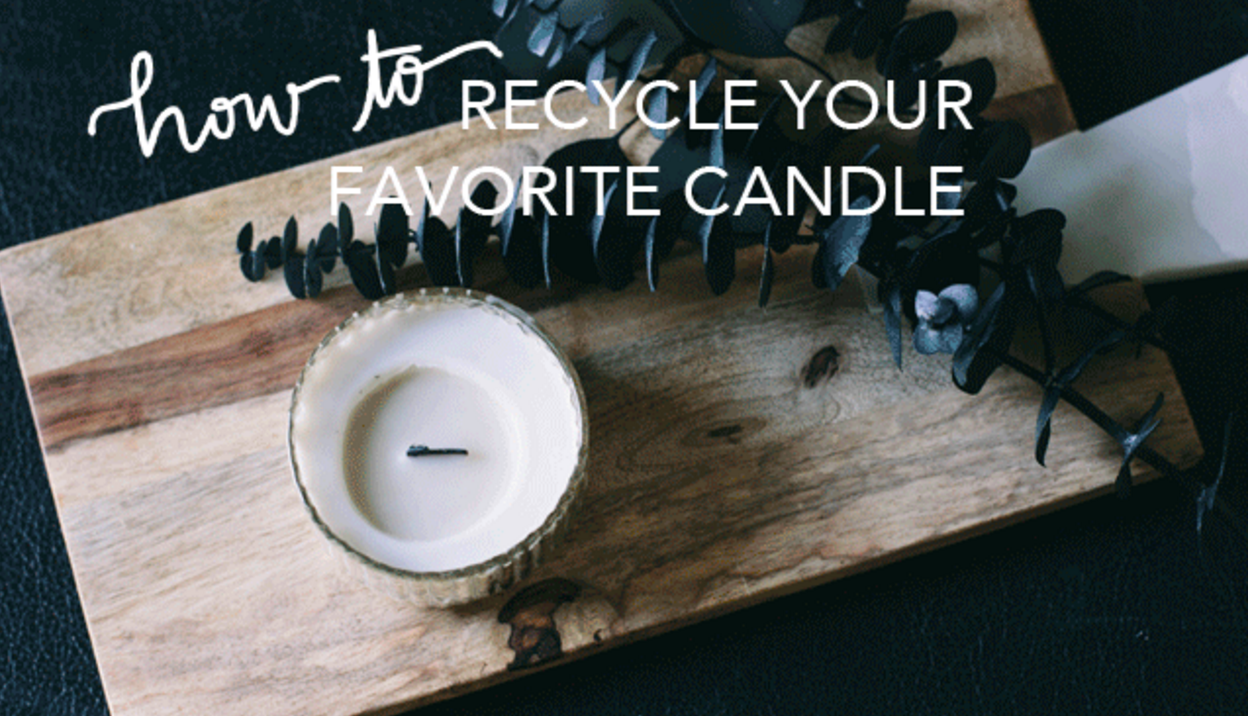
How crafty is this?! Do you have a favorite candle that just doesn’t want to burn anymore?
Supplies: Old candle, Wick, Soy wax, Spoon, Microwaveable Glass, New container for your new candle
The popular blog, Always Rooney, created a post sharing how to recycle your favorite candle: