How to Make Therapeutic Bath Salts!
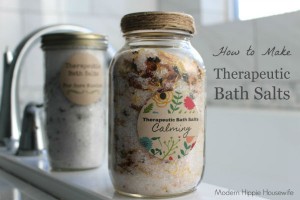

How to Make Therapeutic Bath Salts!
Do you ever have the flu, feel anxious, or want to relax after a stressful day? I know that I’ve felt all of these emotions this year alone! One way to help is by using therapeutic bath salts, but they can be so expensive at the store! So, why not make your own? Here is the basic recipe that you’ll need to make this DIY:
- 3 cups Epsom Salts
- 1/2 cup Dead Sea and/or pink Himalayan
- 1/2 cup herbs and flowers (added mostly for aesthetic purposes)
- 20 drops of organic, therapeutic grade essential oils
Depending on your mood or health, you can use different therapeutic grade essential oils. Here are some examples of the oils that accompany how we feel day to day:
Calming & Hormone Balancing
- Lavender
- Neroli
- Rose Geranium
- Sage
- Sandalwood
- Vetiver
- Ylang Ylang
- Cedarwood
- Roman Chamomile
- Champa
- Clary Sage
- Frankincense
- Geranium
- Patchouli
Cold & Flu
- Peppermint
- Pine
- Tea Tree
- Spruce
- White Thyme
- Aniseed
- German Chamomile
- Eucalyptus
- Fir Needle
- Frankincense
- Lavender
- Myrtle
Sore Muscle & Pain Relief
- Rosemary
- Yarrow
- Aniseed
- Black Pepper
- Cajeput
- Camphor
- Cinnamon
- Clove Bud
- Frankincense
- Ginger
- Peppermint
Good for anxiety and depression
- Bergamot
- Black Pepper
- Cinnamon
- Coriander
- Grapefruit
- Lemongrass
- Lemon
- Neroli
- Nutmeg
- Sweet Orange
- Peppermint
For directions on how to make these salts for your home or additional oils that can be purchased, be sure to visit the Modern Hippie Housewife Webpage! Be sure to visit our Thrifty Momma Ramblings website for additional DIY projects that can be made for cheap with your family!