
Try this Simple & Clean Egg Dying Trick!!
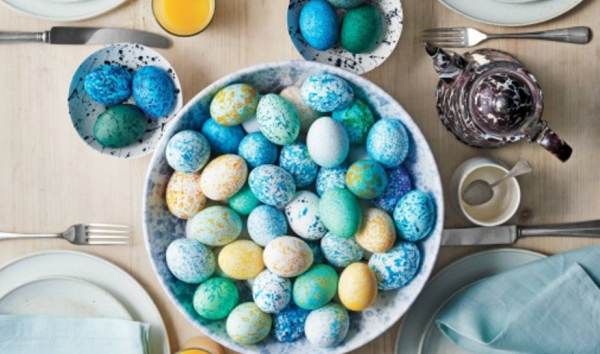
Dying Easter eggs is just one of the many fun things to do during Easter. I personally love the outcome of dyed eggs, but the process of dying eggs can be a real mess! I found this egg decorating trick that could ease up the mess and help save some time too!! Just a few supplies, a few minutes of decorating, and some dry time and you have this years decorated Easter eggs. It is a switch up on the traditional route but I think you’ll like it! They sure are cute!!
Supplies:
- Paper cups
- Dried grains or beans, or nuts
- Liquid food dye (Food color and egg dye, in Assorted and Neon Colors,mccormick.com)
- White vinegar (optional)
- Hard-cooked eggs, plain or dyed
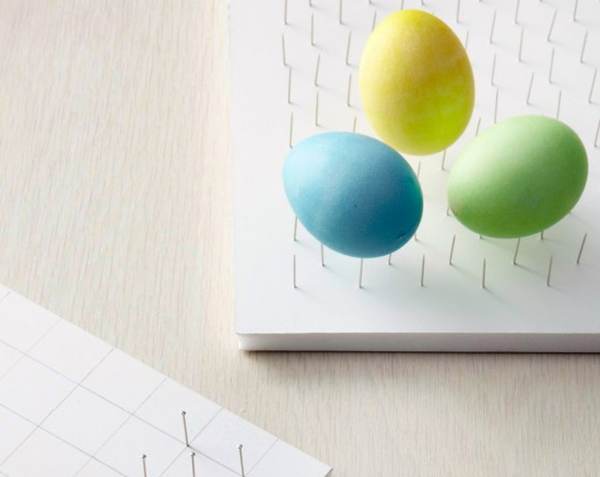
- Egg-drying pin board
First make your Egg-drying pin board
- Using a pencil and rule, draw a 1-inch grid on a sheet of 1/2-inch thick foam board.
- Push flathead pins into the foam, one at intersecting corner in the grid.
- Use tongs to remove eggs from the dye, and set them on the pin-board to dry.
Egg Dying Directions
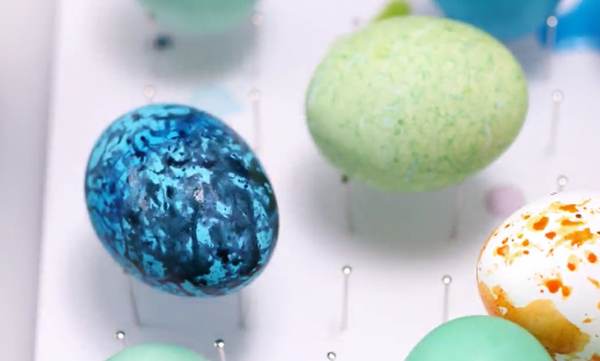
- Fill each cup about one-quarter full of grains, beans, or nuts. Add 10 to 15 drops of food dye. Swirl each until dye coats contents; the mixture should be damp but not soaked. (Note: If mixture dries, add a drop of vinegar or a little more dye.)
- Place an egg in a cup. Gently shake and swirl cup to speckle egg. Repeat with more eggs and colors.
- Let eggs dry on pin board.

This idea came from Martha Stewart!