Tag: Crafts

Add A Little Sunshine On Your Cloudy Day With This DIY!

crafts-copy
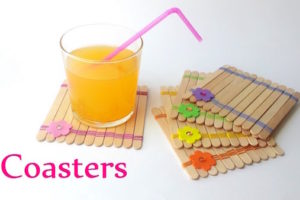
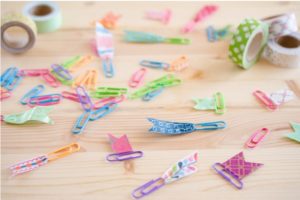
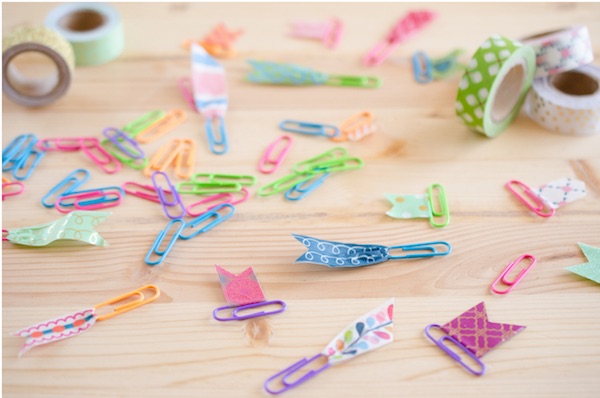
Are you looking for a fun and easy DIY? These are pretty straightforward and great for kids and adults of all ages! Below is a list of material and the direction in in a nifty little video! Thanks for the great DIY idea!!

Materials:
*Popsicle Sticks
*String (any color)
*Embellishments

If you liked this DIY check out our others here! Leave comments below on what you created! As always, Happy Crafting!

Fun And Easy DIY Washi Tape Bookmarks!

screen-shot-2016-10-06-at-4-44-59-pm-copy
Do you like to read, but don’t like to dog ear your page? I used to always dog ear until I found out that bookmarks don’t have to always be rectangles! Here is a super fun and creative way to keep your place, while adding some flare and personality to your book! Below you will find a list of materials and directions!

Materials:
*Paper Clips (any color you prefer)
*Washi Tape (any design or color you prefer)
*Scissors

Directions:
1. Take your paper clip and decide how long you want your washi tape.
2. Cut washi take to match that lenght.
3. Thread washi tape through end of paper clip and match sticky sides together.
4. Cut a fun design off the top like at an angle.
5. When you need to stop reading simply place on the page and close book!

Another great use for these adorable washi tape paper clip bookmark would be to use them in your day planner! If you liked this DIY let us know in the comments below! Check out our other DIY’s here! As always, Happy Crafting!

DIY Halloween Bottle Cap Monsters!

plastic-lid-monsters-2-copy
Fall and Halloween are the perfect times for some scary fun crafts! Get the kids together and gather a few supplies and make the most adorable bottle cap monsters! The kids and I are planning on make these this weekend! Huge shout out to Crafts By Amanda for this great tutorial on this DIY! Check out the full instructions here!

If you enjoyed this craft, let us know in the comments below! As always, check out our other DIY’s here! Happy crafting!

Make These Easy DIY Crayons!

diy-homemade-heart-crayons-copy
Kids are back in school so you might notice you have a bit of free time! In the coming months there will be holidays that require gift giving! These super adorable DIY crayons are the perfect thing to give! Below you will find a list of materials and directions!

Materials:
*Crayons of any colors you want
*Silicone molds (example: hearts, legos, puzzle pieces, gingerbread men)
*Oven
*Patience

Directions:
1. Preheat oven to 230* F.
2. Peel off all the paper off of the crayons. This is where the patience comes in at!!
3. Break crayons into small 1/2 inch pieces.
4. Layer in your silicone molds how ever you like. Remember that the bottom colors will be more vibrant and the top colors will melt into 1 color. There will be chunks of crayons that don’t melt. It’s OK!!
5. Bake in oven until melted. About 10-15 minutes! Melted crayon goo is HOT!!! Becareful!
6. COOL!!!! To speed up this process you can pop the molds into the freezer once the melted crayons have set a bit.
7. Carefully pop them out and your done! Enjoy hours of multi-color fun!

What did you think about this fun DIY! These also make great gift sets. You could buy a mold and a pack of crayons, wrap it up, and gift that! The possibilities are endless! Check out our other DIY’s over here! Happy crafting!

Easy Mason Jar Luminaries Project!

2

Easy Mason Jar Luminaries Project!

Have you been wanting to make some homemade luminaries for yourself or a loved one? I sure have! I recently found this article explaining how to make your own luminaries using mason jars! This DIY project looks both inexpensive and easy to make. Plus, from the photographs, these luminaries look gorgeous after the craft’s completion. If you plan on making this craft as well, be sure to have the following supplies ready:

  • glass gems
  • hot glue gun
  • mason jars
  • tea light candles or battery operated tea light candles
  • solar jar lids

For further instruction on making this project, be sure to read this article from Allison Murray! Let us know how your luminaries turned out in the comment section below.

Fun Fall Wreath DIY!

img_8507-edited2-copy
The long sunny days of summer are fading as the leaves begin to change color. Nothing says fall like the cool crisp nights! Fall is my favorite time of year! I love the colors, smells of freshly baked apple pies, and kids jumping in leaf piles! Here is a fun little DIY to help welcome those signs of fall! Below you will find a material list and complete instructions!

Materials:
*A Natural Looking Wreath
*Burlap
*Wooden Letter
*Favorite Flowers
*Some Cotton
*Craft Paint

For a complete list of instructions on this fun DIY please check out Addicted 2 DIY! She has all the things you will need to do! Let us know what you thought and how your wreath turned out! I can’t wait to make this one myself! I love wreaths!

Easy Fall DIY With Paint!!

crafts-copy
Are you ready to start decorating for fall? Maybe you have already! This is a good one to get the kids to do! Everyone loves to paint and there is little talent needed for this one! I can’t paint at ALL, but I can do this!! The materials like and directions are below!

Materials:
*Card Stock (preferably white)
*Acrylic Paint (pick fall colors like: orange, red, brown, yellow, greens)
*Q-tips
*Brown Construction Paper
*Glue

Directions:
1. First it would be a good idea to go ahead and cut out some tree trunks from the brown construction paper and glue to white card stock.
2. Put a little bit of each color of paint on a plate for your palate.
3. Begin dipping the tip on the Q-tip in the paint and make dots on and around the tree!
4. Keep doing this with all the colors until you feel your tree is complete.
5. Let dry and hang up!

This DIY is very simple and let you be as creative as you want to be! We would love to hear what you thought about this DIY and see all the fun creations you made! For more crafts, please check us out here!