Category: Family Life

3 Key Reasons to Get New Born Baby Pictures

Congratulations! You’re about to become a parent, one of the roughly 3.7 million babies born each year. You’re probably a bundle of both excitement and nerves as the time to deliver approaches.

If you’re looking for a way to commemorate the arrival of your bundle of joy, consider hiring a professional photographer to take some pictures of them.

You may think splashing out like this is extravagant or even a bit silly, but we have a few reasons why you should hire a photographer to take your newborn’s photo.

Read on for our top reasons why you should hire a professional to help you make new memories.

1. You’re Not Going to Have Time to Take the Perfect Shot of Your Bundle of Joy

Unless you’re a professional photographer yourself, it’s unlikely you’re going to find the time to dress your child up and take an adorable photo. You’ll be so consumed with feedings, swaddling, and late nights that you won’t have the time to capture these sweet early days in a way that looks put together. A professional photographer can help you do that so that you’ll have photos you’ll cherish of your newborn baby for a lifetime.

Your newborn isn’t going to stop growing. They won’t wait for you to find time to get things together to take a beautiful photo, so it’s best to book a baby photographer.

2. A Professional Knows What to Capture

Sure, photos of your little one on your phone are great, but a professional photographer can take absolutely gorgeous photos. They can focus on things like your child’s toes, lips, and hands in the perfect light. As mentioned above, your baby is growing fast, and you want to capture as much of them as possible before they’re out of that newborn stage. A professional photographer can help you do that.

3. Safety

You may have a really cool newborn photo that you want to recreate with your baby. You may be able to DIY it at home, but is it completely safe? Do you have the equipment necessary to take this type of photo without added risks? Are you putting your child in harm’s way to get that perfect shot?

A professional photographer, especially one with a lot of experience with babies and children, will have equipment ready to go for you. They’ll know how to get that perfect shot you won’t be able to resist sending to your friends and family without putting your little one in danger.

Hire a Professional Photographer to Capture Those Sweet First Memories

The first few weeks of your baby’s life are when you’re cherishing and bonding with your little bundle of joy. It is incredibly fleeting, and having a professional portrait is a great way to look back on those early days as you’re getting to know your child.

For all things saving money and tips for all the mothers out there, be sure to explore the rest of our site.

What to Know When Starting a Summer Camp for Kids

Are you interested in starting a summer camp? 

It can be a profitable and rewarding venture. If you ever attended a summer camp for kids, you know how impactful they can be. Many kids who attend summer camp create happy memories that stay with them for a lifetime.

Whether you are filled with nostalgia about your own camp experience, or you want to do something that makes an impact, starting a summer camp can be a great thing to do. 

However, running a summer camp takes a lot of time and effort. You have to create an environment that allows kids to play, express themselves, make new friends, and most importantly, want to return the following summer. The summer camp experience has to be parent-approved, kid-approved, and something you and your staff can execute with ease. 

For these reasons, knowing how to start a summer camp the right way is essential. 

Fortunately, by following a few tips and a few summer camp best practices, you can create the ideal foundation for your summer camp program. If you are ready to start a summer camp but aren’t sure where to start, this short and simple guide is for you. 

Choose the Best Age Group 

The first step for starting a summer camp business is to choose the age group of the campers you want to work with. Think about the age group you have experience with or the age group you feel the most comfortable creating a program for. Not only will restricting the age make everything else much easier, but it will also help you better target your niche. 

Determine the Theme of Your Camp

There are all types of camps you can start, ranging from a sports camp to one that is only for dancers. The theme of your camp depends on your experience, interest, and reason for starting the camp. You can also choose a general theme for your summer camp. 

Create a Camp Schedule 

The best summer camp has structure and a strict, daily schedule. Ideally, your campers should have an experience that is different from school, is enriching, but also provides them with the fun and activities kids expect. 

Choose the Location You Will Have Your Camp 

The next step is to choose where you will have your summer camp. There are a variety of summer camp options, depending on where you live. Choose a camp that has amenities and is in a natural setting so you can plan outdoor events for the children to enjoy. 

Know How to Make Your Camp Officially a Business

Before launching your summer camp, you need to make sure it’s an official business. Depending on a few factors, you may or may not need a business license to run your camp. Check your local city requirements to determine what actions you need to take to make sure your camp is legal. 

Acquire Insurance  

Just like any other insurance, summer camp insurance exists to cover you financially should any unfortunate events happen. Talk to an insurance agent and ask what type of insurance you need to purchase. Make sure you are following all the recommendations from your insurance agent. 

Implement Health and Safety Measures

When working with children, it’s essential to implement health and safety measures. You should have camp policies, medical staff onsite, the campground inspected, an emergency plan, and more. Make sure you are also following all local rules and regulations when implementing the health and safety measures for your camp. 

Set a Reasonable Price 

Although starting a summer camp can be rewarding, it can also be an expensive venture. For this reason, you need to make sure the price you set will cover your expenses while also bringing in a profit. 

Start by researching camps in the area to understand the average price for the area. Depending on your resources, you can also consider charging on a sliding scale to ensure all kids can enjoy your summer camp. 

Hire and Train Staff

It’s important to choose the right staff for your summer camp. You want to choose people who are great with kids, friendly, energetic, and have a sense of fun. Make sure to run background checks before hiring anyone and train your staff properly before the launch of your summer camp. 

Determine the Registration Process 

One important task you need to complete before you open your camp is to determine the registration process. You need a process that allows for pre-registration and is hassle-free for your campers. 

Consider using registration software to streamline the process overall. If you are not sure which software to use, visit www.info.ultracamp.com.

Create a Marketing Campaign

Once you have completed all of the steps to set up your camp, you have to reach parents so they can register their kids. To do this, you need to get the word out about your camp and all the fun and benefits a child will experience. Consider adding your camp to online directories, working with schools, encouraging referrals, marketing on social media, and more. 

Collect Feedback and Keep in Touch

After your camp is over, it’s important to collect feedback from your campers and stay in touch with their parents. The feedback you collect will help you improve your camp for the next year and keeping in touch with parents will help you encourage repeat campers. 

This Is What You Need to Know When Starting a Summer Camp for Kids

There are several things you should know before starting a summer camp for kids.

You need to determine the age group of your campers as well as the theme and the schedule. You also should know the location of the camp and understand how to make sure the camp is legal and safe for the kids. Make sure you are training your staff properly, marketing correctly, and keeping in touch to encourage return campers.

Follow these tips to start a summer camp the right way.

Don’t forget to browse our site for advice on family, fitness, travel, and more. 

5 Crafts Using Plastic Craft Lace

If you’re one of the many mamas working remotely, or from home right now, you’re not alone. You’re also not alone in trying to figure out how to keep your youngsters busy!

As a thrifty mom, looking for some easy craft projects to keep those little ones out of trouble, you’ve come to the right place! Great arts and crafts projects are easy to make when you’ve got plenty of plastic craft lace.

What’s plastic craft lace? How do you use it? We’ll fill you in on the top plastic lace projects.

You might feel surprised to find that you already have some, laying around the house!

So what are you waiting for? Let’s get crafting with craft lace!

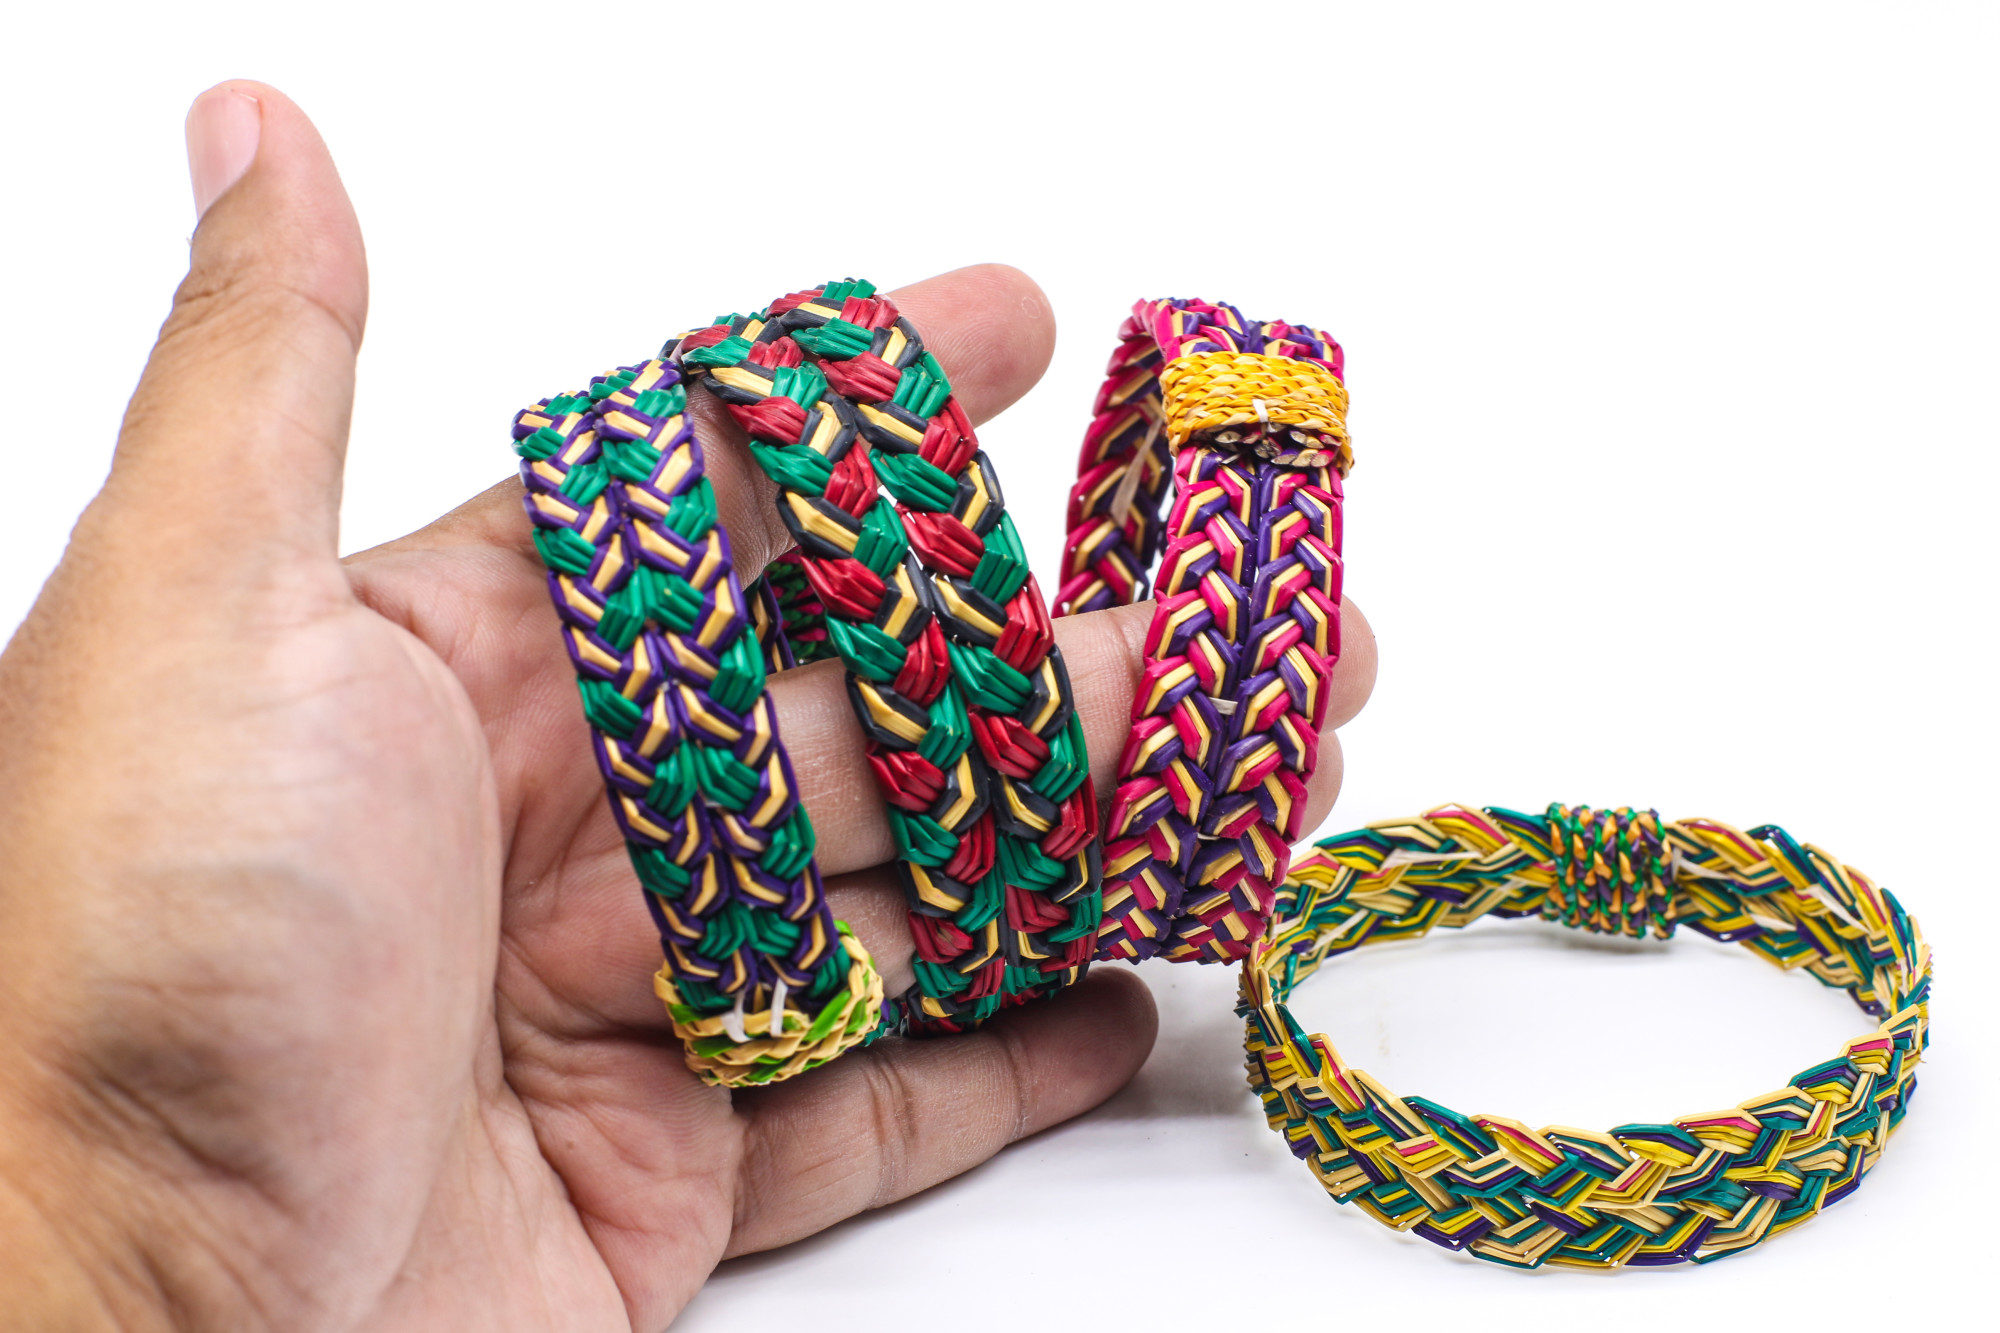
What Is Plastic Craft Lace?

Craft lace, or plastic craft lace, is like flat plastic yarn or string. It comes in spools of many different colors. You can use it for many arts and crafts projects.

Where Can I Buy Craft Lace?

You can get great deals on plastic craft lace online or at your local craft store. Be sure to watch out for deals in your local coupon circulator, or in your email inbox, so that you can get a good deal!

You’ll want to get a variety of colors as well, to make your projects stand out. ‘Fun packs,’ with multiple different colors are an economical and high-value place to start.

What Other Supplies Do I Need?

With just some plastic craft lace, you can get started right away! However, there are some other tools you might want to consider buying to help make your projects easier. These include:

  • Scissors
  • Clear-drying craft glue or a hot glue gun
  • Beads (for finishing projects)
  • Lanyard snaps or keychain rings (to secure the tops of the projects)
  • Pliers (to help pull the stitches tight!)

Top 5 Projects With Plastic Craft Lace

Now that you know what plastic craft lace is and where to find it, let’s get started on some easy craft projects!

1. Keychains

Sometimes called ‘boondoggles,’ these cute, chunky keychains are a great way to make your keys stand out.

For This Project, You’ll Need:

  • 2, 1-yard pieces of craft lace in different colors
  • Key chain ring (optional)
  • Scissors
  • Bead for the end (optional)
  • Craft glue

To Complete This Project:

1. Put your two pieces of lace together, and make an ‘X,’ with the strands meeting in the middle. If you want, you can use a keychain ring as the meeting point. It might be helpful to secure the ends with tape, until you get comfortable.

2. Keeping the laces parallel, take the lace on the bottom of the X, and loop the top lace down, and the bottom lace-up. This should make an ‘N,’ shape.

3. Take the second color lace, and weave it through the ‘N,’ formed by the first lace; over the top, and under the bottom.

4. Pull the 4 loose ends tight! You should have a neat, boxy pattern.

5. You can repeat this stitch, or get fancy, and add spirals and more laces to get a cool effect.

6. To finish, you can place a bead at the end, pulling all the strands through. Apply some glue and weave the ends of the laces through the bead.

7. Let dry and attach your keys! You’re ready to go!

2. Zipper Pulls

Don’t you hate it when a zipper breaks? You won’t anymore! With these super cute and functional zipper pulls, you’ll be able to repair your zip-ups in style!

For This Project, You’ll Need:

  • 2, 1-yard pieces of plastic craft lace in different colors
  • Lanyard Snap
  • Scissors
  • Bead for the end
  • Craft glue (clear drying)

To Complete This Project:

1. Slide the two pieces of craft lace into the lanyard snap, until they meet at an ‘X,’ in the middle.

2. Keeping the laces parallel, take one of the laces and form an ‘N,’ shape. Each end should be bent across the center point.

3. Weave the second lace over and under the ‘N,’ created by your first lace. It should look like a messy, loose box pattern.

4. Pull the four loose ends tight! You should have a neat box.

5. It’s the same idea going forward, but easier now! Repeat the weaving pattern until you’ve reached the length you want.

6. To finish, you can place a bead at the end of the zipper pull and attach with a little dot of craft glue. Weave the loose ends through the bead and tighten to secure.

7. Let dry and voila! Attach to broken zippers to give them new life!

3. Friendship Bracelets

Nothing makes you feel like a kid again like friendship bracelets. Make one to wear with your daughter to honor your special bond.

For This Project, You’ll Need:

  • Plastic craft lace in different colors
  • Beads, as many as you’d like to weave or braid in
  • Scissors

To Complete This Project:

 1. You have a couple of options for this project. You can follow the instructions for a keychain or zipper pull, OR you can do a simple 3-strand braid.

2. For the 3-strand braid, start with a simple knot to keep the three pieces of craft lace secured. Try adding different color beads as you go; this adds texture to your friendship bracelet.

3. When you’ve reached the desired length, either tie off the bracelet (as above) or finish the braid with a simple knot and dot of glue.

4. Affix the loose ends at the bottom to the knot at the top. Add another dot of glue for extra security.

5. Slip on your wrist; beautiful!

4. String Art Paintings

If you’re not feeling up to a longer, more complicated project, this creative painting idea can be a great way to go. As long as you don’t mind getting a little messy!

For This Project, You’ll Need:

  • Craft lace, multiple size pieces
  • Canvas, any size
  • Painter’s tape, to secure the strings
  • Acrylic paint or spray paint
  • Newspaper, for covering the workspace

To Complete This Project:

1. You need a sense of adventure for this project! Start by covering your workspace with old newspaper.

2. Make a geometric pattern or design on your canvas using the craft lace. You can wrap one strand around multiple times, or use several pieces for a different effect. Secure the lace on the back of the canvas with tape.

3. Paint over the lace using acrylic or spray paint. Let dry.

4. Carefully remove the tape and the lace from the canvas. The resulting pattern should be a beautiful design of white space and the paint colors you used. Discard the tape and painted-over lace.

5. Enjoy your homemade art!

5. Homemade Gift Tags

This is an easy way to get kids involved with holiday gifts: making homemade gift tags!

For This Project, You’ll Need:

  • Cardstock or heavy paper
  • Plastic craft lace, different colors
  • Single hole punch
  • Scissors
  • Markers, stickers, other things to decorate!
  • Craft glue (optional)

To Complete This Project:

1. For this project, have your young helper cut out pieces of cardstock or heavy paper. Mom can help with this part, or give them some scalloped safety scissors to make a cool border.

2. Decorate your tags; you can use markers, stickers, paint. The sky is the limit!

3. Punch a hole in the corner of your gift tag.

4. Secure the paper gift tag to the gift with plastic craft lace. You can use multiple strands for a colorful effect, or just one, whatever your preference.

5. To make ahead, tie the craft lace into loops around the paper gift tag, and secure with a dot of craft glue. These gift tags will be ready for the holiday season!

What To Do With Your Finished Projects

Now that you’ve mastered these projects with plastic lace, what to do with them? Read on for further inspiration!

Keepsakes

You’ll love looking back at these projects when your little ones are grown. You’ll love remembering these crafts you made together!

Sell on Craft Websites

Once you get really good at making plastic lace projects, you can sell them! This is a perfect solution for a busy mom looking to make an extra few dollars.

Gifts for Family

Whether it’s gift tags or zipper pulls, your family and friends will love to receive gifts made with craft lace. These colorful, fun gifts will brighten anyone’s day!

Endless Creativity, Endless Possibilities

Now that you’ve discovered, or rediscovered, plastic craft lace, it’s time to let your creativity shine! These children’s craft projects are perfect for rainy days, travel activities, and simple, thrifty fun. But their utility doesn’t end there!

You can have your kiddos help you with these projects all year long. Who knows? It may even turn into an extra source of income for you or a great gift for someone you love.

For more tips for working moms and work-from-home mamas, be sure to read our other DIY blogs. Follow us on social media, so you never miss a deal, a giveaway, or free samples.

Fresh Start: Marriage Advice for Newlyweds

If you haven’t heard yet, love is hard. It’s a garden that needs constant tending, and love is the foundation you will build your marriage upon. You don’t give up on it, for better for worse.

Even if you’re still in the honeymoon phase, it’s important to follow this marriage advice for newlyweds. That way, when the going gets rough, you are prepared to weather the storm.

Communication

This is one of the most commonly suggested tips for newlyweds, but there is depth to this concept. Dig into your own emotions. If your spouse has done something that shouldn’t be a big deal but feels like a slap in the face, evaluate what the deeper issue is that needs addressing.

It may not be that the dirty dishes were left out, but that fact that your spouse doesn’t seem to value your time. Let them know if a way that isn’t an attack or accusation. Express how their actions come across (they may not be aware that it’s an issue at all), and let that be the beginning of a dialogue on how to find a solution.

Emotional Support

Your spouse should be the first person you turn to for comfort. Friends and family are fantastic for support, love, and advice, but your spouse is your other half and the most intimate relationship you have.

Some of the best marriage advice for newlyweds is to understand how your spouse needs your support. This can be solving the problem or being a shoulder to cry on. Responding to a spouse’s struggle in the wrong way can make matters worse and lead to arguments.

It’s a Marriage, Not a Partnership

The Bible explains when Adam and Eve came together, that two become one. When you look at marriage as two individuals joining together, it doesn’t mean you lose part of yourself or your individuality. It means that you become more. Your spouse is your other half, not your roommate.

A partnership is two people splitting the work 50/50 to reach a shared goal. A marriage is two people loving the other and each giving the other 100% for the rest of their lives.

Quality Time Together

When giving marriage words of wisdom for newlyweds, couples counselor Robin Bryant, Ph.D. says, “In a digital age, where there are distractions left and right, unlimited access to information and continuous connection to others’ lives online, it’s essential to spend quality time with your significant other.”

There will be seasons in life that are busier than others. Even at the busiest times of deadlines and projects, or recitals and games, it’s important to make sure you are dedicating a portion of time with your spouse.

Romance

Your spouse will never say, “Stop being so romantic,” or “You’re loving me too much.” Using whatever way your spouse understands best that you love them will always be appreciated.

For this, it’s important to know if your spouse responds best to physical touch, gifts, time spent together, or by acts of service.

A Little Marriage Advice for Newlyweds Goes a Long Way

Having someone who knows you better than anyone else, who will stick by your side, makes you laugh, and loves you unconditionally is is one of the greatest joys. When you remember and apply these principles, it doesn’t make marriage perfect, but it does prepare you to handle each situation with love and compassion.

If you liked this marriage advice for newlyweds and are looking for more, check out our section on Family Life.

How to Plan a Funeral for a Lost Loved One

Many people want to be remembered after they die. But few people plan for remembrance. 

A 2015 survey found that 89 percent of Americans believe in having conversations about their funeral. Yet only 17 percent have made arrangements. 

One stumbling block is that most people don’t know how to plan a funeral. They assume it requires a lot of work, so they don’t bother. 

It takes some background knowledge and persistence to plan one. But once you get the facts, you can plan and host a funeral within days of someone’s passing. Here is your quick guide to funeral arrangements. 

Making Funeral Arrangements

After someone dies, you should contact their legal representative. Their representative should have a copy of the person’s will and their funeral plan. If their will and plan exist, you can follow the instructions in there. 

Contact the loved ones and friends of the person who passed away. Even if the person had been sick for a while, some of their friends may not have known. If this would be too overwhelming for you, have someone else reach out. 

If they don’t have a funeral plan, you can make your own arrangements. Call a funeral home in the area. Most metropolitan areas have specialized homes for veterans, non-Christians, and BIPOC. 

Meet with a funeral director as soon as you can. You may be able to schedule an appointment for that day, or you can talk to them over the phone. 

See if they can pick up the body of the deceased person. Dead bodies begin to deteriorate quickly, and they can spread disease if not maintained. A funeral home will store the body until final preparations need to be made. 

You do need to decide the deposition of the body. You can opt for a traditional burial, but you can also cremate the body. 

You should see if your loved one can donate their organs. If that is not an option, they can donate their body to science. 

Consult with family members and friends as you start to make arrangements. You may not want a funeral service, but some people do. 

Planning a Funeral Service 

There are many funeral ideas that you can base your service on. Many people like to hold a religious service. 

This is an event that occurs at a house of worship. Family members perform prayers and rituals. This is a good idea if the person was devout. 

But you can hold a secular service. You can host an event at a funeral home or at someone’s house. People can read remarks and gather to share stories of your loved one. 

A celebration of life is an informal occasion. Many celebrations involve sharing humorous stories and playing your loved one’s favorite music. It is a good option for a casual person who died of natural causes. 

A military funeral service is similar to a religious or secular service. Members of the military attend the service and present a flag to the next of kin. The Department of Veterans Affairs provides free cemetery plots and headstones, but you need to contact them in advance. 

Some fraternal organizations like the Fraternal Order of Eagles have their own funerals. You will need to contact an affiliate branch to see what they offer. 

You can hold a funeral service after someone has been cremated or donated their body. You do not need to have the body in the room with you. You can bury ashes or sprinkle them in a location your loved one liked to be in. 

Take time figuring out the right option. Once you’ve selected one, contact the venue as soon as possible. 

Holding a Funeral 

You can schedule the funeral for whenever you want. You do not have to have one right away, though scheduling one as soon as possible helps the grieving process. 

Let the minister or host of the venue run the event. You do not have to speak or host anything if you don’t want to. Be with your family and friends. 

If you do choose to speak, take some time planning out your remarks. You can put things in your own words, or you can read poetry or prose. 

Sharing photos and flower arrangements can provide a person touch. Consider placing up a photo of your loved one with the words, “In loving memory.” You can place a memorial book near it so people can write their thoughts and feelings. 

After the service itself, you can host a wake. You can serve some food and drinks and allow people to mingle. 

Finding Additional Ways to Remember Someone

A funeral does not have to be the end of remembrance. It is a good idea to follow up a funeral with some other actions. It keeps your loved one’s memory alive, and it gives you something to do with your grief. 

You can start a fund in your loved one’s name. This is a good idea for people who were involved in an educational or political institution. 

You can make individual donations in your loved one’s name. You can give to a charity, food bank, or local community group. 

Write down stories and thoughts about your loved one. Remain in touch with their family and friends in the weeks that follow the funeral. 

Spend time with yourself and your family. Grief takes time and you should not rush anything. Give yourself space to express yourself and think about what has happened. 

How to Plan a Funeral 

Learning how to plan a funeral requires some background knowledge. You can follow a plan set out by your loved one. If they don’t have a plan, talk to their family about what to do. 

You have a wide range of funeral options to choose from. Find a funeral director who can help you prepare. 

Attend the funeral and let the director run things. Find some other ways of remembrance like donating to charity. 

Living in the wake of someone’s passing can be hard. But you can get help with the facts. Follow our coverage for more lifestyle guides. 

How to Set Up a Nursery: Everything to Consider

The time is almost here. Soon, you’ll be bringing a newborn into this world. You’d better learn how to set up a nursery before the little one’s arrival.  

You’re going to need furniture. Obviously, your baby has to have a crib to lay in. Once you have your furniture, you’ve got to find a room to put it in.

Somewhere in your home, that’s easy to get to when the baby needs you. There’s also your budget to consider.

Nursery furniture isn’t the cheapest thing in the world. We can teach you how to set up a room that won’t hurt your wallet. Keep reading to learn more.

Choosing a Space

Before you can check out this baby bedding product and begin bringing furniture into your home, you need a room to put everything in. There’s a lot to consider when picking out a space. 

First off, it should be large enough to hold everything that the baby needs to live comfortably. You can’t have the little one overheating so, ventilation is a must. 

Lastly, think about where the room is in correlation to the rest of the rooms in your home. You need to be able to hear your baby when they need you. It’s hard to get to them fast if they’re on the second floor at the end of the hallway. 

Setting Your Budget

Once you have a room picked out, it’s time to set your budget. Some parents can afford all the high-end furniture and still have some money left over for all the baby’s beginning expenses. 

Some are on a little tighter budget, and that’s okay. Concentrate on getting all the must-haves first. Calculate how much it will cost you for a crib, dresser, comfortable chair (for you), and a changing table. 

Once you have all of this, you can worry about any extras that you want to have. Keep in mind that babies aren’t cheap. They’ll have a lot of expenses that don’t involve the nursery that you’ll have to worry about. 

Pick a Theme

Many parents like to choose a fun theme for their nurseries. You can go as plain or as outrageous as you want to go. There is no right and wrong when it comes to how to decorate a nursery. 

If you want to grab a bunch of stencils and paint fun cartoon characters all over the walls, you do you. When choosing colors, we will say that you should consider calming shades like blue. 

Gender doesn’t matter when it comes to keeping your baby asleep. 

Furniture

When picking out your furniture, you can buy the pieces individually or pick up a set. You might be able to shave some of the money off your total by springing for the set. 

If you are strapped for cash, consider grabbing furniture that has more than one function. For example, a dresser that you can also use as a changing table. 

Storage 

If you fail to opt for storage or don’t learn how to organize a nursery, you will regret it down the line. Babies need tons of stuff. If you don’t have a place for it all, it will overtake your home. 

You’re not going to be able to use all the baby clothes that you have laying around. Your relatives might give you outfits that are way too large for the newborn right now. Label these items and put them away until the little one grows into them. 

Organize the clothes that they can wear now and place them in a dresser. Consider using dividers to separate them based on type. It will keep everything neat and easily accessible. 

Most cribs raise off the ground. That means there’s a bunch of unused storage space under them that’s ripe for the picking. Take advantage of it. 

Childproofing

It’s never too early to start childproofing. It’s better to do it when they’re still an infant instead of waiting until they’re crawling around everywhere. 

Place padding over sharp corners. Any small item that your little one can put in their mouth is a choking hazard. They have no place in your nursery. 

If there are any cords in the room, tape them to hide them and place covers over your outlets. Hanging mobiles are a great touch to any nursery, but make sure your baby can’t reach up and grab it. 

Give the Ceiling a Splash of Color 

Your baby is going to spend most of their time on their back. That’s the safest way for them to sleep. You should give them something nice to look at. 

Consider painting your ceiling a calming color or paint a mural up there. Anything to keep your baby happy. 

Create a Little Mom Station 

Your baby isn’t the only one who benefits from setting up a nursery the right way. Optimize the room with you in mind as well. You need a comfortable chair to sit in while you nurse your newborn. 

Consider grabbing a side table. This way, everything you need can be within reach. Make sure to stock the area with wipes, burping cloths, and other supplies as well. 

How to Set Up a Nursery That’s Perfect for Your Little One 

If you want your bundle of joy to be comfortable when you bring them home from the hospital, you’re going to need to learn how to set up a nursery. There’s more that goes into creating the perfect room besides the crib. 

We hope that you’re able to use this guide to optimize for storage, create the ultimate mom corner, and decorate your nursery to perfection. If you’re looking for more ways to set up a baby’s room on a budget, we can help. Check out our blog for additional tips and tricks.

This Is How to Calm a Child Down Before Bed

Oftentimes, getting children to sleep can seem nearly impossible. Whether you are dealing with a child who keeps getting out of bed and wanting your attention or you have a child who won’t get in bed at all, bedtime can be a frustrating experience you may not know how to handle.

For many reasons, knowing how to calm a child down before bed is one of the best skills a parent can have.

The calmer bedtime is, the better rested your child will be, and the better they will function throughout the day. Putting your child to bed without a fuss can also ease your stress and allow you a peaceful night’s sleep.

Fortunately, by using a few tips you can calm your child before bed and get them to sleep without any fuss. If you are a tired and frustrated parent who just wants bedtime to be easy, this short and simple guide is for you. 

Set a Bedtime

One tip for calming a child down is to set a bedtime. When your child’s bedtime is sporadic, they are not creating the habit of going to sleep. Setting a bedtime is the first step to having a calmer sleep routine overall. 

Create a Bedtime Routine

A great tip for how to calm down a child is to create a bedtime routine. A wind-down routine can soothe your child and help them get into the mindset of going to bed. Consider adding nighttime hygiene, a bedtime story, and other activities to your bedtime routine. 

Set the Tone

One way to encourage calm children before bedtime is to set the tone. Children can pick up on your stress and anxiety and act out because they are feeling the same emotions. Approach bedtime with a calm and relaxed attitude and try to remain calm throughout the process. 

Address Fears

Sometimes children don’t want to go to bed because of fear. They might have watched a scary movie or think monsters are hiding under their bed. Make sure to address these fears as best as you can to calm them before they go to sleep.

If your child is experiencing a lot of fear, consider using a helpful supplement, such as calming drops.

Create a Relaxing Sleep Environment

A great way to encourage a peaceful bedtime is to create a relaxing sleep environment. You can dim the lights, put on sleep music, or level up your efforts by painting their ceiling with the galaxy or using other calming elements in their room. This can also be a great addition to your bedtime routine. 

This Is How to Calm a Child Down

By using these tips for how to calm a child down before bed, you can create an effective bedtime routine for your child.

Start by setting a bedtime and a bedtime routine. You should also set a calming tone, address any fears your child might have, and create a relaxing environment. Make sure to give your child everything they need, such as a security object or a bedtime story.

Follow these tips and you’ll be well on your way to having a calming bedtime routine.

Don’t forget to browse our site for advice on family, relationships, health, and more.