Have you ever ventured out in the wonderful world of brownies to see what you will find?! Today I did just that! I have complied 4 of the most delicious looking brownie recipes. I am hopeful each one of these is lip smacking good!! I have taken the time to make sure there is something for everyone on this list! If you try one you have to let me know what you think in the comments below!!
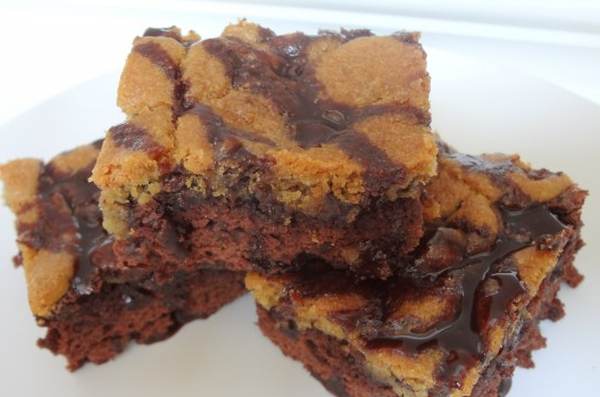
Brookies
Ingredients:
- 1 box Betty Crocker Original Supreme Brownie mix with Hershey’s Syrup pouch
- eggs, water and oil for brownies
- 1 regular size Nestle Toll House Chocolate Chip pre-made Cookie Dough
Instructions
- Set your oven to 350 degrees.
- Mix brownie mix according to directions on box.
- Add batter to greased 9×13 in. baking pan.
- Cut the cookie dough in ¼ inch slices.
- Place slices of dough on top of the brownies and gently wiggle them down into the brownie mix.
- Bake for 25-30 minutes. Let them cool for 15 minutes. Slice and drizzle with Hershey’s syrup pouch and enjoy!
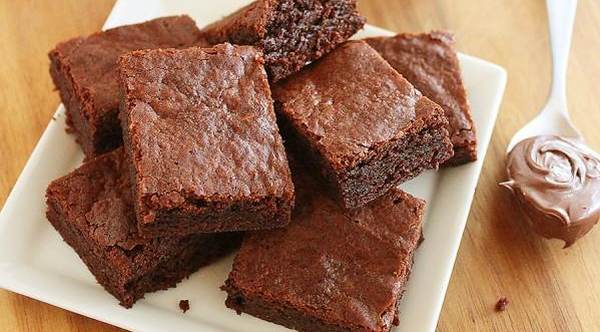
Incredible 3 Ingredient Nutella Brownies
Ingredients:
- 1 1/4 cup (13 oz.) Nutella
- 2 large eggs
- 1/2 cup all purpose flour
Instructions:
- Preheat oven to 350 degrees F. Lightly coat an 8×8-inch (or 9×9) baking dish with nonstick cooking spray.
- In a large bowl, combine all ingredients and mix until smooth. Pour into prepared dish and smooth top with spatula.
- Bake for 25-30 minutes, or until a toothpick inserted comes out clean. Be careful not to over-bake, otherwise brownies will dry out. Let cool before cutting and serving.
- TIP: For fluffier, cake-like brownies, add 1/2 teaspoon baking soda.
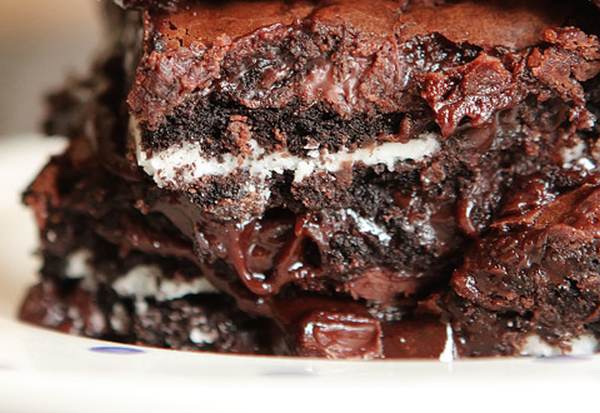
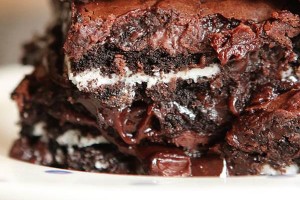
Cookies ‘N Cream Oreo Fudge Brownies
Ingredients
- 1 box Brownie Mix
- eggs & oil (as called for by the brownie mix)
- 1 heaping half cup (6 oz) Cookies & Cream ice cream
- ¼ Cup hot fudge topping (chilled or room temp)
- 1 pkg Oreos (regular, Double or Mega Stuffed! Your choice! :))
Instructions
- Preheat oven according to directions on the box and coat an 8×8-inch baking dish generously with nonstick cooking spray.
- Combine brownie mix, eggs, and oil as directed on the back of the box, but do not add the water. Add ice cream and hot fudge to the brownie batter and stir to combine.
- Pour half of the brownie batter into the baking dish, layer with Oreos, then top with remaining batter.
- Bake for 40-50 minutes or as directed on the back of the box. Do not overbake. Middle may look gooey, but will set up once the brownies cool. Let cool completely before cutting.
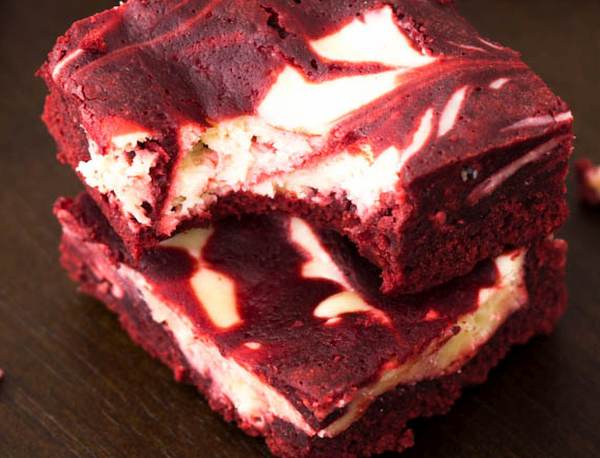
Red Velvet Cheesecake Swirl Brownies
Red Velvet Brownie Ingredients:
- 2 large eggs
- 1/2 cup (1 stick or 115g) unsalted butter
- 1 cup (200g) granulated sugar
- 2 teaspoons vanilla extract
- 1/4 cup (21g) unsweetened cocoa powder
- 1/8 teaspoon salt
- 1 Tablespoon liquid or gel red food coloring
- 3/4 teaspoon white vinegar
- 3/4 cup (95g) all-purpose flour (measured correctly)
Cheesecake Swirl Ingredients:
- 8 ounces (224g) cream cheese, softened
- 1/4 cup (50g) granulated sugar
- 1 egg yolk
- 1/2 teaspoon vanilla extract
Instructions:
- Preheat the oven to 350F degrees. Spray 8×8 baking pan with nonstick spray. Set aside.
- Make the brownie layer first. In a small bowl, beat the 2 eggs together. Set aside.
- Melt the butter in a large microwave safe bowl in 30 second increments until melted.
- Stir in 1 cup sugar, 2 teaspoons vanilla extract, cocoa powder, salt, food coloring, and vinegar.
- Mix each of those ingredients into the batter in that order.
- Whisk in the eggs, then fold in the flour until completely incorporated. Do not overmix.
- Pour the brownie batter into prepared baking pan, leaving about 3-4 Tablespoons for the top.
- Make the cheesecake swirl.
- With a hand-held mixer on medium speed, beat the softened cream cheese, 1/4 cup sugar, egg yolk, and 1/2 teaspoon vanilla in a medium bowl until completely smooth – about 1 minute.
- Dollop spoonfuls of the cream cheese mixture on top of the prepared brownie batter.
- Cover with the last few Tablespoons of brownie batter.
- Glide a knife through the layers, creating a swirl pattern.
- Bake the brownies for 28-30 minutes or until a toothpick inserted in the middle comes out clean.
- Allow the brownies to cool completely before cutting into squares.
Thanks! madeinaday, thecomfortofcooking , kevinandamanda, sallysbakingaddiction