Category: Easter

Hatching Deviled Egg Chicks Recipe!

chicks

Easter Deviled Eggs Recipe

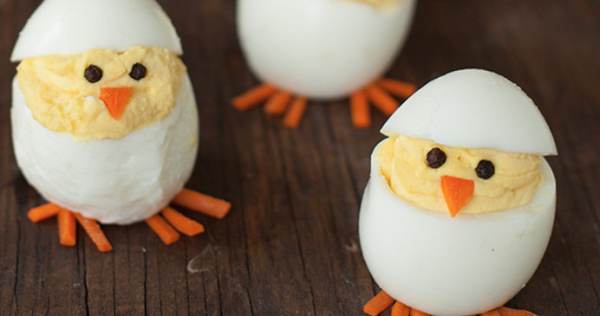
Lets face it, there will be a surplus of boiled eggs around your house toward the end of the month.  That is why this deviled eggs recipe will be very useful to you!  I saw these hatching chicks deviled eggs and I had to share! They are too cute and would be a perfect addition to any Easter brunch or potluck you are attending.

Deviled Eggs Recipe

Ingredients:

  • 12 large eggs
  • 1 tablespoon salt
  • 1/4 cup regular mayonnaise, more or less to taste
  • 1 tablespoon Dijon mustard
  • 1 tablespoon sweet or dill pickle relish
  • Kosher salt and freshly cracked black pepper, to taste
  • 1/4 teaspoon of Cajun seasoning, or to taste
  • Paprika, for garnish (my mom always called this “pretty powder”)

Instructions:

  1. Place eggs in a sauce pan.
  2. Cover with water and bring to a full, rolling boil for about 15 minutes on high.
  3. Carefully drain the pot and rinse with cool water until the feel cool to touch.
  4. Peel the eggs and cut in half lengthwise.
  5. Remove the yolks and place into a bowl.
  6. Using a fork, mash the yolks well.
  7. Add mustard, pickle relish, salt, pepper and Cajun seasoning and stir together, adding only enough of the mayonnaise for desired consistency (creamy).
  8. Pipe the yolk mixture into the egg whites using a pastry bag, or place into a plastic storage bag and snip off the corner.
  9. Dust with paprika for garnish.

To make the chicks:

  1. While the eggs are cooling, prep your beaks and feet.
  2. Use a julienne peeler, which makes things go much faster, but you can also use a knife. Julienne part of a carrot into matchsticks, and then use a knife to slice the matchsticks into 1/2-inch pieces. You will need seven pieces per chick.
  3. When you’re ready to make your chicks, crack the egg all over with a spoon. I like to use a spoon with a slightly pointed tip, which is really helpful in the next step.
  4. Once your eggs are peeled, it’s time to shape them. Lay the egg on its side, and cut a small slice off the bottom (flatter) end. This gives it a base to stand on. You can eat that little slice now, since you won’t need it. Then cut about 1/2 – 3/4 inch off the top (pointy) end. This end piece is going to be the top of your chick.
  5. Scoop all the yolks out of the eggs (don’t forget the tops too), and mix them with the filling ingredients. Put your filling into a plastic bag with a corner end snipped off, and pipe it into your eggs.
  6. Place a top slice of egg white on each chick, and add two peppercorns and a piece of carrot to make the face. You may find it easier to use tweezers for these tiny pieces.
  7. Arrange the eggs however you would like to serve them, then add feet by slipping the remaining slices of carrot under their bodies. Again, tweezers can help with this step. Place three pieces together on each side to make the feet.
  8. Refrigerate until ready to serve, but try to serve them within a couple of hours to keep the yolks looking fresh.

Thanks, sheknows!

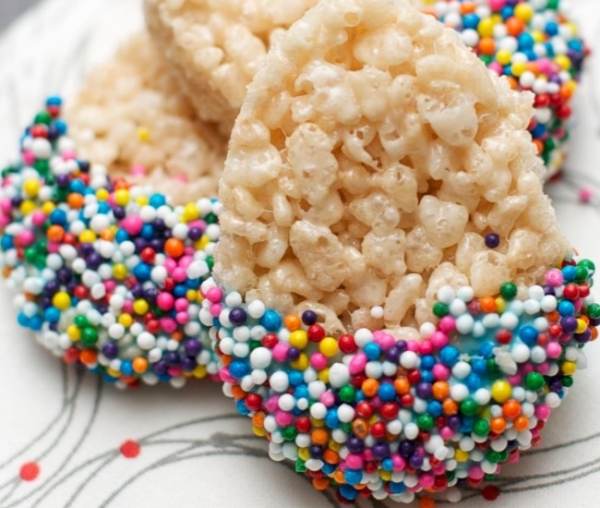
Easy Easter Rice Crispy Desserts

Rice Crispy Treats are always so much fun to make and eat.  I have gathered 5 recipes that gives a creative twist on the average Rice Crispy Treat.  All the ideas are Easter themed, no bake, and all are pretty easy to make.  Use these for a dessert for a party or an activity to do with the kiddos.  I can’t wait to try the Cadbury Egg Rice Crispy! Send me pictures (via Facebook msg)  if you make any of these, I would love to see them!

Easy Easter Cookies
easter1

Ingredients

  • 3 tablespoons of butter or margarine
  • 1 package (10 oz., about 40) regular marshmallows
  • 4 cups of miniature marshmallows
  • 6 cups of Rice Krispies
  • ½ cup of turquoise candy melts
  • candy sprinkles
  • easy kids easter party food sprinkles

Directions
1. In a large saucepan, melt butter over low heat. Add marshmallows and stir until completely melted. Remove from heat. Add cereal. Stir until well coated.

OR

1. Microwave butter and marshmallows on HIGH for about 3 minutes, stirring after 2 minutes; stir until smooth.

2. Pour the mix into a 9” x 13” x 2” pan that has been coated with cooking spray. Put a sheet of parchment paper over the mixture (to keep from sticking) and roll it out until it is about ½” thick.

3. Use an egg-shaped cookie cutter to make egg shapes (periodically dip the cookie cutter in water to keep the marshmallows from sticking to it).

4. Lay the egg shapes on a cooling rack until they’re firm enough to handle.

5. Heat the candy melts in the microwave in a small bowl. Dip one end of the eggs into it.

6. Return to the cooling rack momentarily, with a cookie sheet underneath to catch any drips.

7. Dip the treat ends into sprinkles and return to the cooling rack until they’re firm.

For best results, use fresh marshmallows.
1 jar (7 oz.) marshmallow crème can be substituted for marshmallows.
Diet, reduced calorie or tub margarine is not recommended.
Store no more than two days at room temperature in airtight container.
To freeze, place in layers separated by wax paper in airtight container. Freeze for up to 6 weeks. -Let stand at room temperature for 15 minutes before serving.


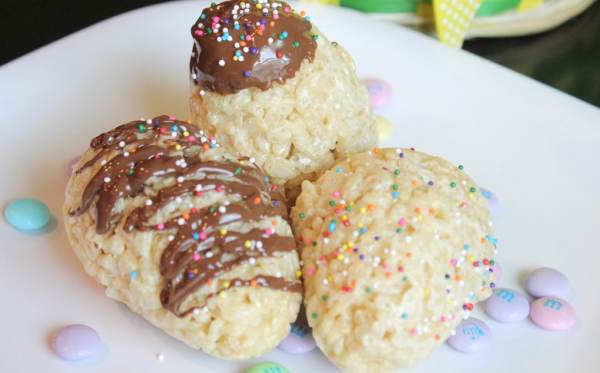
Kellogg’s Rice Krispies Hidden Surprise Easter Egg Treats
easter2

Ingredients

  • 3 tablespoons Butter or Margarine
  • 1 package (10 oz., about 40) regular Marshmallows OR 4 cups of miniature Marshmallows
  • 6 cups Kellogg’s Rice Krispies Cereal
  • ½ cup M&M’s Brand Chocolate Candies (plus some for snacking)
  • Canned frosting or decorating gel (optional)
  • 12 plastic snap-apart 3×2-inch Easter eggs

Instructions

  1. Thoroughly clean Easter eggs then coat inside of plastic eggs with cooking spray. Set aside
  2. In large saucepan, melt butter or margarine over low heat. Add marshmallows and stir until completely melted. Remove from heat.
  3. If your saucepan is large enough, add Kellogg’s Rice Krispies cereal and stir until well coated. If your saucepan is not big enough, add Kellogg’s Rice Krispies cereal to a large bowl and pour marshmallow mixture on top, stirring until well coated.
  4. Using greased hands, firmly press ¼ cup of cereal mixture into each plastic egg half. Use fingers to make hollow center in each half. (TIP: Use a rounded tablespoon measuring spoon and press firmly in the center of each egg. This will make hollowing out the center much easier.) I used a mini muffin pan to hold the egg halves upright while I was finishing the whole batch.
  5. Once the eggs have set, remove from molds and place on wax paper.
  6. Place about six M&M’s in each egg half. Gently press two halves of each egg together until they stick.
  7. You will have to have patience and keep pressing and molding around the seam.
  8. Let cool completely and decorate with frosting and M&M’s, if desired. I used melted semi-sweet chocolate and sprinkles for ours.


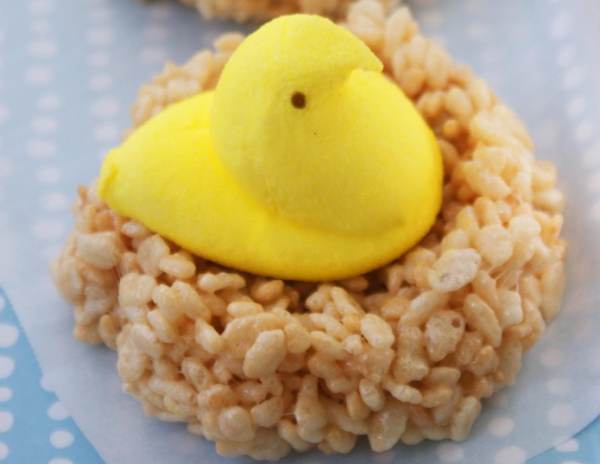
Marshmallow Peeps in Crispy Nests
easter3

Ingredients:

  • 12 PEEPS® marshmallow chicks
  • 6 cups crispy rice cereal
  • 3 Tbsp. butter or non-hydrogenated margarine
  • 4 cups miniature marshmallows or 10 oz. regular marshmallows

Directions:

  1. In a medium saucepan, melt butter over low heat. Add marshmallows and stir until completely melted. Remove from heat, add cereal and stir until well coated.
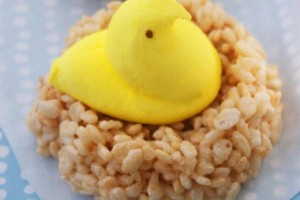
  2. Scoop out a handful of the mixture and shape into nests with lightly dampened hands. Set on a parchment-lined sheet, press a PEEPS® chick into each nest, and let them sit until set. Makes a dozen.


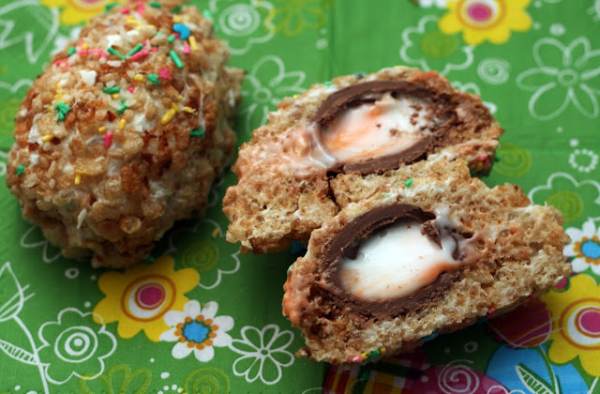
Coconut Cadbury Rice Krispies “Scotch Eggs”
easter4

Ingredients:

  • 4 Cadbury Creme Eggs, refrigerated overnight and unwrapped
  • 2 tablespoons butter
  • 2 3/4 cups crisped rice cereal (Rice Krispies)
  • 1/4 cup sweetened or unsweetened dessicated coconut
  • 24 marshmallows
  • sprinkles

Instructions:

  1. Melt butter over low heat in a large pot.
  2. Add marshmallows and stir until nearly completely melted. Removed from heat and stir in cereal and coconut.
  3. Quickly and carefully cover each egg in the coconut mixture and form into an egg shape.
  4. Roll or sprinkle with sprinkles.
  5. Cool completely.
  6. Wrap in plastic wrap or store in an air-tight container.

Note: If you’d like to make more than four, make them in batches rather than doubling or tripling the recipe.


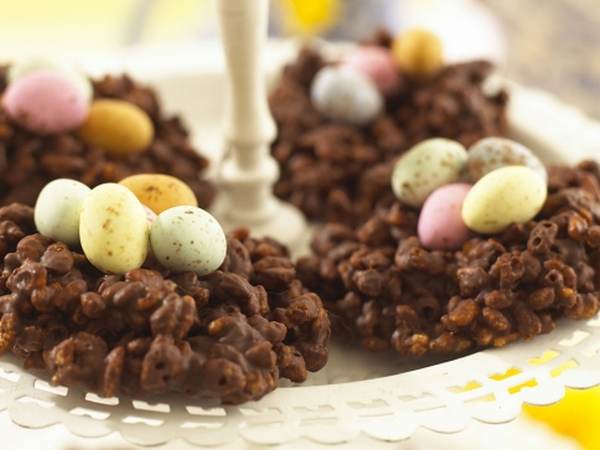
Chocolate Easter Egg Baskets
easter5

Ingredients:

  • 6 ounces good-quality dark chocolate, broken or chopped into small pieces (about 1 cup)
  • 4-1/2 cups Ricke Krispies
  • 72 mini chocolate eggs (I used Cadbury mini eggs)

Instructions:

  1. Place the chocolate in a microwave safe container. Heat at 50% power for 1 minute Remove and stir well.
  2. If chocolate is not melted, return it to the microwave and continue heating, stopping to stir it every 10 to 20 seconds to avoid scorching.
  3. When only small lumps remain, remove and continue to stir until the chocolate is completely melted.
  4. Add the Rice Krispies and stir to coat well with the chocolate.
  5. Divide the mixture evenly among 24 paper baking muffin cups.
  6. Flatten each “nest” a little to make a well in the center.
  7. Fill each cup with 3 Cadbury mini eggs.
  8. Let them set until firm.

Thanks! spaceshipsandlaserbeamssimplybeingmommybabble, coconutandlimesimple-nourished-living
 

Baby Chicks Cupcakes! Perfect for Easter!

chick

Baby Chicks Cupcakes! Perfect for Easter!

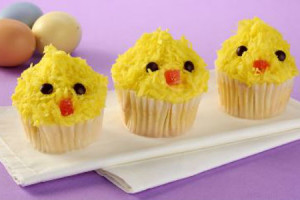
Want to make Easter even more fun for your kids? If so, why not make a holiday-themed treat?! You can make the  All-in-one Cupcakes & Frosting – Baby Chicks Recipe! I have not yet made this sweet treat with my kids, but I know they’d love the adorableness! Do you think your kids would enjoy this? If so, you’ll need the following:

  • 6 oz. – cream cheese, softened
  • 1 cup – butter or margarine, softened (2 sticks)
  • 1 tablespoon – vanilla extract
  • 1 – (2 lb.) pkg. Domino® Confectioners Sugar
  • 2/3 cup – milk, divided
  • 4 – large eggs, slightly beaten
  • 2 1/2 cups – all-purpose flour
  • 1 teaspoon – baking powder
  • 1/2 teaspoon – salt
  • 2/3 cup – water

Decorating Ingredients:

  • 1 (14 oz.) bag – shredded coconut
  • yellow food coloring
  • 1 (12 oz.) bag – mini candy-coated chocolates
  • 24 – orange jellybeans or gumdrops

Let us know how your recipe turns out and if you enjoyed it, we’d love to know! For additional details on how to make this sweet treat, be sure to visit the Domino Sugar Webpage!

Target Cartwheel: New 25% Off Easter Seasonal Decor Offer!

easter1

Target Cartwheel: New 25% Off Easter Seasonal Decor Offer!

Calling all Target shoppers! Are you planning on picking up some Easter items this weekend? If so, we have a new Target Cartwheel Savings Offer for Easter! You will be able to save 25% off Easter Seasonal Decor! This includes some of the following: Easter decorations, dye kits, grass, plastic eggs, baskets, tableware, window clings, and more.

Keep in mind that this offer excludes snacks, candy and filled baskets. Also, this this offer is only valid today and tomorrow – it expires March 5th! What are you planning on picking up with this new offer? Let us know, we love to hear from our readers!

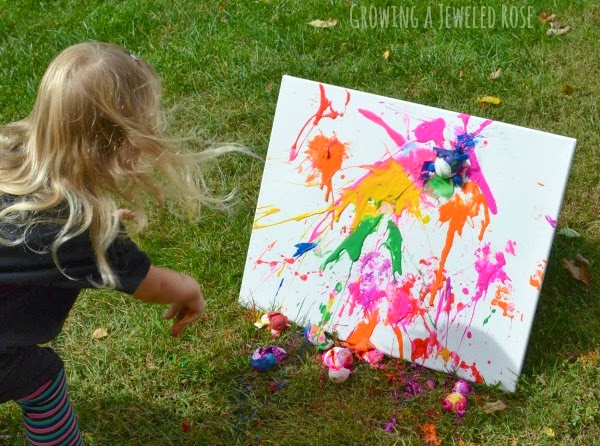
How Do You Paint With Eggs? Find out how!

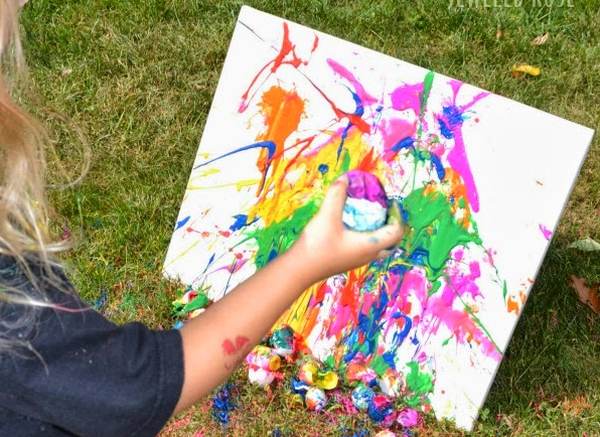
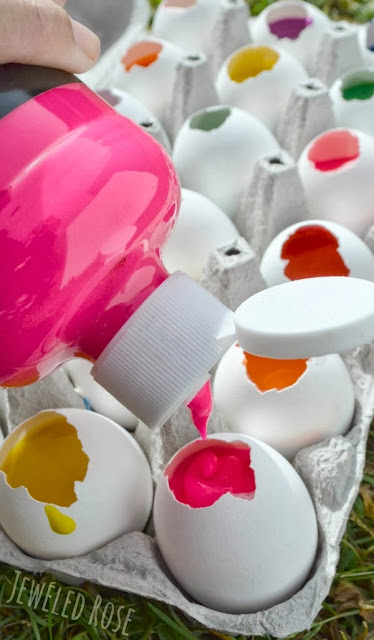
This activity uses recycled eggs, is cost effective, and would totally be so much fun for the kids to play and create at the same time.  You will also get a painting that you will be able to hang and adorn your playroom or kids bedroom walls.  Scroll down to get all the instructions to this fun filled activity.  If you create this, send me a picture I’d love to see your kiddos creations!
eggpainting

Paint Filled Eggs on Canvas


Supplies:
  •  Emptied eggshells
  • Paint (we used washable tempera)
  • Tissue paper
  • A glue stick
  • Optional: A canvas- you could also use poster board or paper

Instructions:

  1. Use a butter knife to gently crack the top of the shells, making a hole big enough for the egg to pass through.
  2. Give the eggshells a quick rinse with warm water and anti-bacterial soap and place them back into the carton to dry.
  3. Fill the eggs with paint.
  4. Fill eggs with paint and toss them at canvas! This project is surprisingly easy to set up and SO FUN!
  5. Seal them using tissue paper and glue.
  6. Use a glue stick to cover one side of a tissue paper square and then gently stick that over each egg opening.
  7. Allow the kids to freely throw the eggs at a canvas.
  8. Let the canvas dry and decorate your wall with your kiddos egg art!
Paint filled eggs on canvas


Super Fun Easter Egg Bath Bombs!

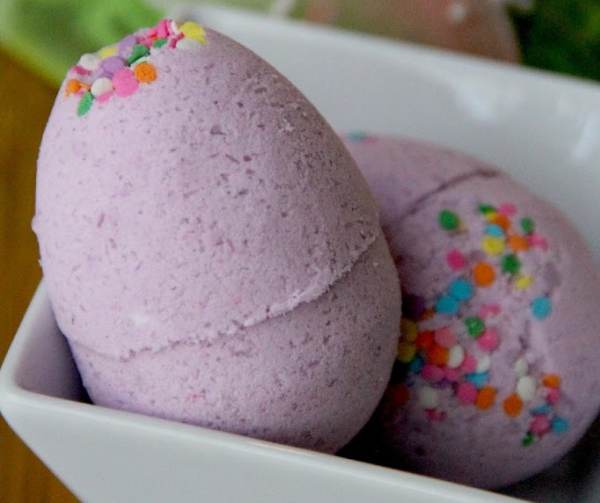
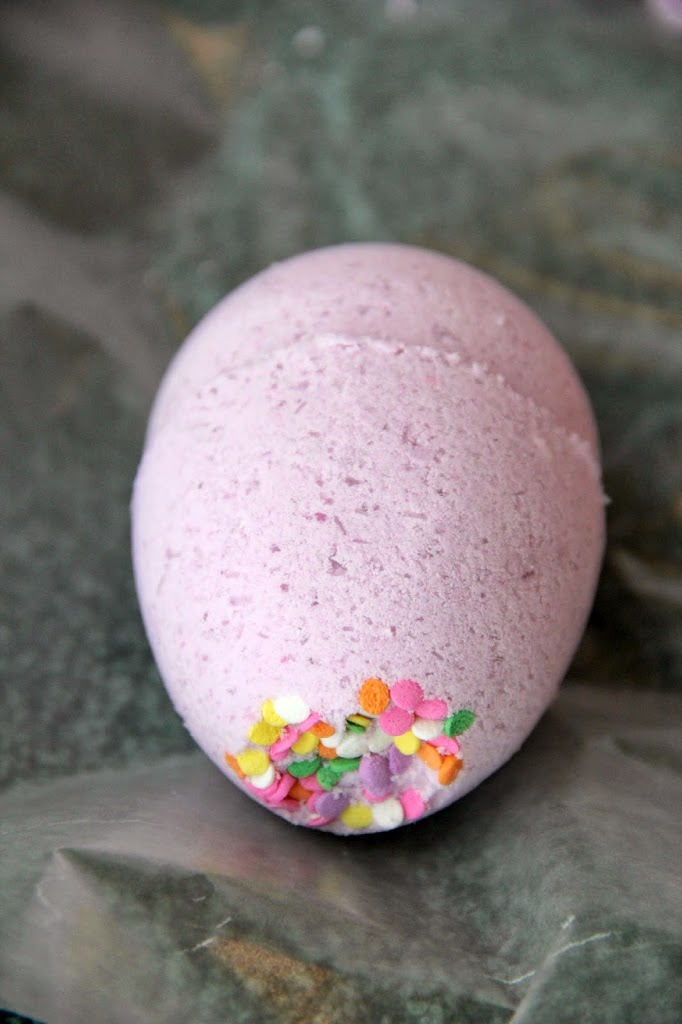
Aren’t these bath bombs one of the cutest things you’ve seen in a while!! Bath bombs are so useful and so easy to make. You could give these as gifts to a teacher, friend or neighbor. You can toss them in the bath with the kiddos or use them for yourself.  They are fun to make, fun to give as gifts, and are a great gift to give.   For the instructions on how to make these beauties scroll down and see for yourself how simple these can be!!

bathbomb1

Super Fun Easter Egg Bath Bombs!

Ingredients (Will make 6 large bath bombs)

  • 8 oz. Baking soda
  • 4 oz. Epsom salt
  • 4 oz. Cornstarch
  • 4 oz. Citric acid
  • 3 teaspoons water
  • 2 teaspoons essential oil or fragrance oil for soaps, etc.
  • 2-5 drops food coloring
  • Larger plastic Easter eggs or silicone/plastic mold
  • Confetti sprinkles (optional)

Instructions:

  1. In a large bowl, combine the Epsom salt, cornstarch, baking soda and citric acid. Stir the ingredients together using a whisk.
  2. In a separate small bowl, mix together your wet ingredients: water, fragrance/essential oil and food coloring.
  3. Pour your wet ingredients into the bowl with your dry ingredients and whisk together.
  4. The mixture will start to clump a little. Use your fingers to ball up a bit of the mixture to see if it is starting to stick together a bit. If not, you can add a little more water, but be careful. ONLY add a very little at a time or you will ruin the entire mixture.
  5. Take one of your eggs and put a little of the confetti sprinkles in one side or both.
  6. Then start tightly packing the bath bomb powder into both sides of the egg. Make sure there aren’t any air pockets – just a small hole is enough to make your bath bomb crumble so really pack the mixture in tightly.
  7. Then push the 2 sides of the egg together and let the egg sit on a towel covered with waxed paper for at least 15 minutes.
  8. After 15 minutes carefully pry open the egg to see if the mixture has formed to the mold. If it has, it will look the picture below .
  9. The eggs need to dry completely overnight before you try and use them or package them up as gifts.


Thank you, bitzngiggles!!