 “It’s called paint- it’s cheap and comes in a can.” This has to be one of the best quotes I’ve heard while watching a tv show. I really wished I could remember which show I was watching, but this is exactly how I feel about paint. Paint is a wonderful inexpensive way to spruce up just about anything. I didn’t want to replace my kitchen cabinets since they are actual wood and not cheap particle board. The cabinets are in excellent condition but just needed a facelift. To paint or not to paint was the question. I really wanted the kitchen to be brighter and stained wood darkens spaces. In the end, I decided to paint them. Below are the steps that I took and some pictures. (Oh quick note, that picture was drawn by my husband. I asked if he could draw me a paint bucket with brush for this post. I outlined it in paint, but will eventually figure out how to actually paint in photoshop. I think he did a fabulous job!)
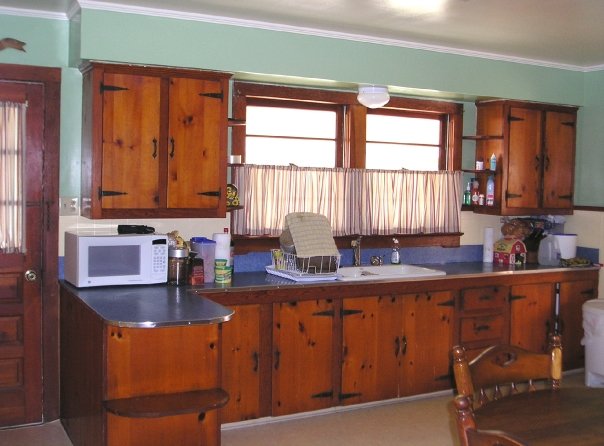
How I Transformed My Kitchen Cabinets
I must have looked up almost a hundred articles and websites looking for information on properly painting previously stained cabinets. The problem is so much of the information, even from the “experts”, varies by technique and even properly cleaning or degreasing the doors. I decided to use a no rinse TSP cleaner. Then I did lightly sand the doors since the stain was pretty old and faded. After I wiped them down with a clean tack cloth, I have knotty pine wood so I used a shellac primer in a spray can just on the knots. The knots vanished after I primed the doors with a regular primer.
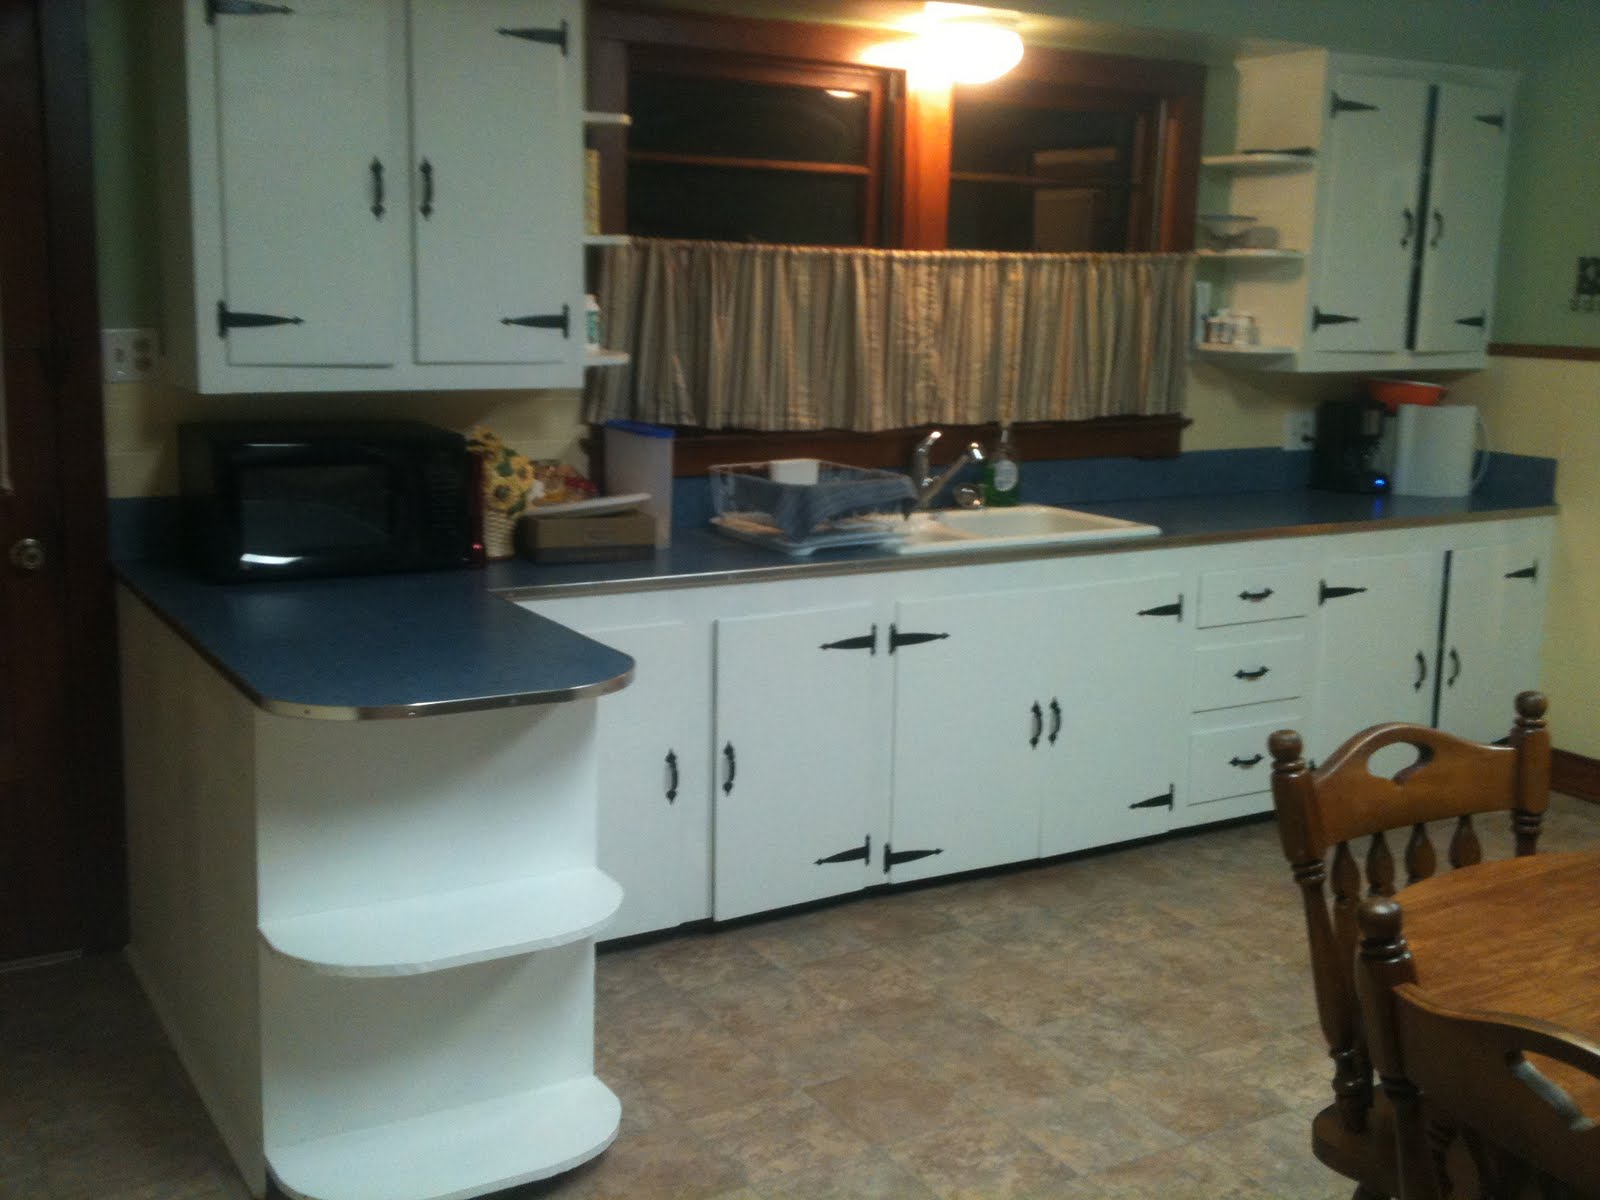
Finally I did use 3 coats of white Kitchen and Bath enamel paint. It is a little more expensive than a semi-gloss, but it’s made for specifically for a high humidity. I used a paint brush and not a sprayer. I didn’t know how to use a sprayer and I definitely was not willing to experiment. I used a very high quality paint brush made to eliminate brush strokes. I have to admit it came out great. I can barely see any strokes, and I am very happy with the results. The whole process of cleaning, sanding, and painting took me about 2-3 days. I had 16 doors so I had to paint eight one day and paint the remaining eight the next day. I did let the doors dry for about 4-5 days. I was a little paranoid. Most experts recommend at least three days. I know many people would not use a white, but I have found it very easy to keep the cabinets clean. I just wipe them a couple of times a week after I do the dishes. The best part is my kitchen is much brighter, even with the lights off.
Spray Paint- Who Knew?
I really wanted to replace the door handles, but we couldn’t find new handles to match up as the old ones are hung differently than today. I cleaned them, but couldn’t get all the rust out. My brilliant husband suggested we just spray paint them. We got a flat satin black and one with the primer already mixed in. It cost us about $8 with tax and it worked perfectly. The handles look brand new again! I am thrilled with the results, and it was much cheaper than buying 20 new handles. The total project cost us $90! That includes all the paint, primer, brushes, and sandpaper. I did get some discounts with coupons that I was mailed. I think that saved me about $12-15. I have brand new cabinets and handles for under $100! We did splurge on the better paint, but I think it was worth every penny. I think a picture is worth a thousand words…literally!