
I have stumbled upon a few DIY projects that all have the same theme – gold spray paint! It’s amazing how a little gold paint really goes a long way in decorating. Remember- you don’t have to do just gold, you can switch it up to your color of choice. Let me know if you do any of these super cute DIY’s! I’d love to see how they turn out!
For the kitchen…

Supplies:
- cardboard or paper
- plastic primer spray paint
- gold spray paint
Instructions:
- In a well-ventilated area, on a piece of paper or cardboard, start by spraying the back of your letters with the primer. (you can sprayed right over the magnets. They hold just as well with the paint.
- Cover both sides of the letters with two coats of the primer
- Then follow with two coats of the gold or until the letters are completely painted. Allow time for drying in between each coat.
For a kids/teens/play room, or holiday decor…
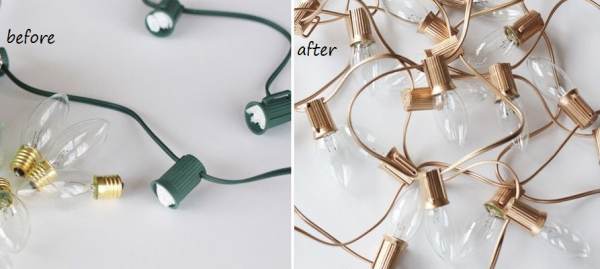
Supplies:
- Christmas lights
- paper towels
Instructions
- Take your Christmas lights out of the box.
- Unscrewed all of the light bulbs and set them aside.
- Tear paper towels into 2×2 inch squares and stuff one in each socket to protect from the spray paint.
- Then take the wire outside to a well ventilated area and hang from a nail
- The paint dries quickly, in about 10 minutes.
- Screw all of the lights back in and you are done
For anywhere…
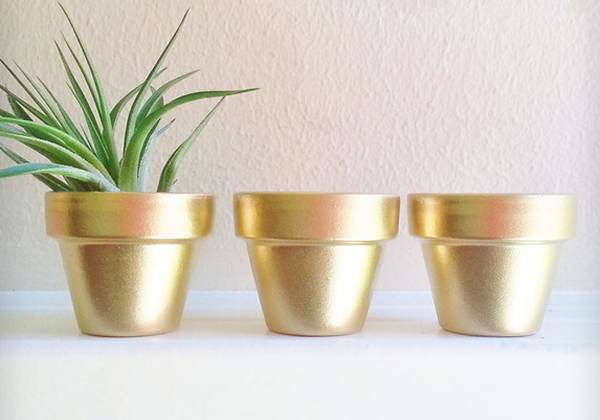
Supplies:
- Terracotta pots
- White acrylic paint
- Paint brushes
- Gold metallic spray paint
- Cardboard
Instructions:
- Flip the pots upside down with the opening sitting on the cardboard
- Paint the pots with a base coat of white acrylic paint
- when bottom drys flip over pots and give the tops a good paint along with 2 inches into the inside of the pot
- when acrylic paint dries take outside to a well ventilated area and paint gold
- Paint 2 coats. Let sit until dry.