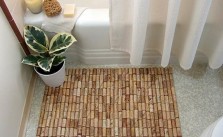
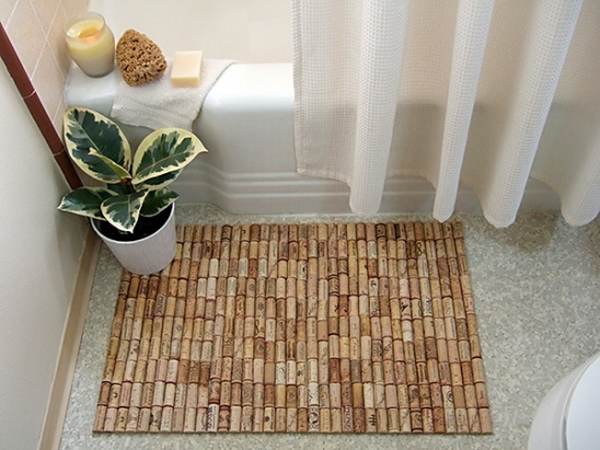
DIY Wine Cork Mat
This mat can be used both in the bathroom and entry room. Cork absorbs water so it is great for both of these rooms. You can make use of all the corks from your wine bottles and ask your friends to save theirs too.
- Gather the corks. If you’ve been collecting corks, check that you’ve got enough, as you’ll need around 150 to 200. If not, additional corks can be purchased from brewing or wine-making suppliers, craft stores or through online retailers. Also check your local thrift store as sometimes they get people’s collections of old corks. If using used corks, check that they’re clean. They should be free of dust, wax or any build-up. Warm soapy water is best for cleaning them––just ensure they’re thoroughly dry before beginning the craft project.
- For wine-stained corks, simply soak them overnight in a bowl of water to which you’ve added a touch of bleach. This should remove the wine. Rinse clean, and allow to dry thoroughly before using.
- Slice each cork in half, lengthwise. Be especially careful not to slice your fingers when doing this. It helps to wear work gloves during this part of the process and lay down a non-slip surface for the cutting board to sit on, such as a silicon map, before beginning. Take plenty of breaks, as there are a lot of corks to get through––grab a friend to help if possible. To slice the corks in half:
- Stand the cork up on the cutting board or cardboard, then cut downward. Hold the top of the cork with your finger and slice it neatly in half.
- Sand the sides of the cork if they become too jagged. Gently run the sandpaper down the sides and along the middle to ensure a smooth, clean surface.
- Create the bathmat base. Use a plastic shelf liner or shower mat to serve as the base––a previously designed rubber shower mat may be the best option, as it will provide structure. However, your mat will be more flexible if you choose to use a plastic shelf liner. A more solid alternative can be to use a piece of water-resistant wood, like marine-ply (or wrap the wood in plastic or oil it––the latter option may make gluing hard though).
- Determine the size by either using another shower mat as the guide or measuring the custom size you desire. Consider your bathroom dimensions when determining size.
- Cut the liner using either the box cutter or the sharp knife. If you need to size the base, use a ruler or straight edge to mark areas to cut.
- Lay the shower mat or cut shelf liner down flat on the floor or on another flat surface. Cut the liner or mat either on a work table or on an outside patio so you don’t slash your floor or any furniture. Placing a self-healing cutting mat underneath can be helpful.
- Arrange the cork halves around the perimeter of the line or mat. Begin by creating a border with cork halves lining up vertically along the edges of the mat:
- Line the corks up so the bottom of each cork (end) butts up to the sides of the mat or liner.
- Complete the entire perimeter of the mat with corks until the entire mat/liner has been lined with corks. If you don’t achieve a perfect fit, cut some of the corks to fit.
- Apply hot glue to the flat half of each cork and press the cork into the liner or mat. Use a dab of glue at the top and bottom of each cork and press firmly into the mat. Use a rag to wipe any excess glue that may ooze out from beneath the corks.
- Add the remaining corks to the mat. Create a pattern or design with the cork layout, working your way from the outside inward with the remaining cork halves. Continue either with the vertical pattern or consider laying corks in a horizontal fashion and then alternating for each surrounding row.
- It’s probably a good idea to lay out the cork halves first to determine a pattern and then glue the corks to the mat after you’re sure they will all fit. That way, you won’t start your mat and then get stuck if your pattern doesn’t work out or if you don’t like they way it looks.
- Trim corks if needed to accommodate the size of the mat/liner. Keep your knife/scissors handy in case you need to customize cork size.
- Allow to dry completely before using. It might be a good idea to apply a coat of protective sealant such as polyurethane or cork sealant across the top of the cork bathmat, to waterproof it. However, corks can withstand small brushes with liquid (after all, they are in wine bottles a lot of the time), provided they’re not constantly soaked. You might find the mat lasts okay if you don’t end up with a floor awash with water each use and if you drop a small hand towel over the top of it before stepping on it from the shower. On the other hand, as with all bathroom items, there is a risk of mildew growth over time. This can possibly be avoided by placing the mat up somewhere that allows air circulation to dry it, and leaving it in the sun once a month or so, to ensure it dries out well. Whether or not you add a sealant is really a personal choice, and you might like to ask your local eco-hardware supplier if there are some eco-friendly choices for sealants available.