This is a step by step tutorial to help you set up this app for your Facebook page. If you have any questions, then please contact me. Please click on the images if you need to see them in a larger size.
Before you can create a giveaway on Power Giveaways, you need to make a Facebook app for your Facebook Fan Page if you do not have one already set up. Or you might want to set up a new one.
Click Here to set up your Facebook Application
*NOTE: If you do not have an application set up at all, then you will have to create one.
So please read this tutorial which will guide you and then come back to finish. How to Create a Facebook Application
Now that you have a Facebook application, we can move onto the next step!
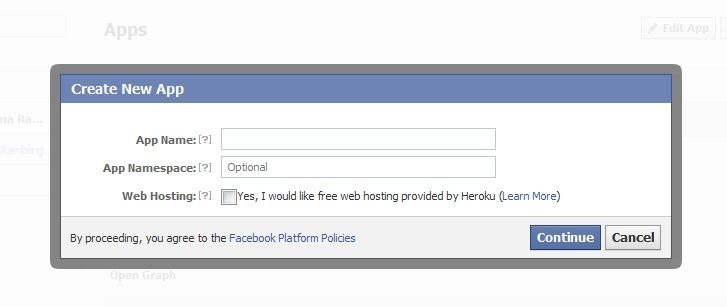
First Click on Create New App button in the right hand corner.
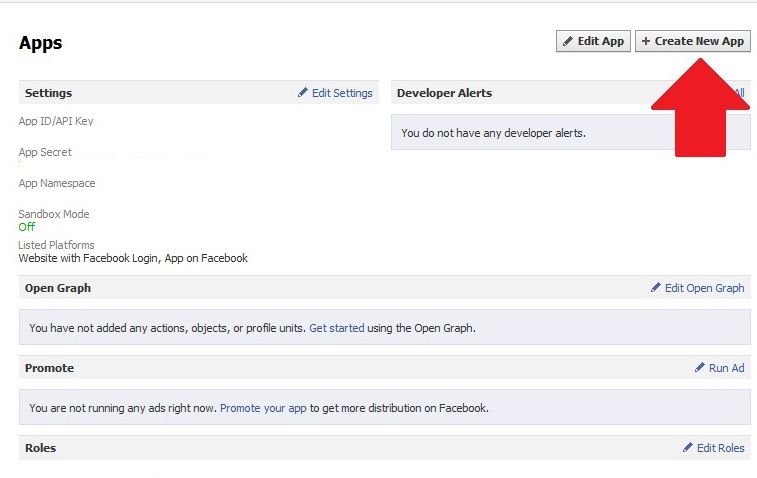
You can name the application anything you want so I named mine thriftymomma. There is a limit on how many letters you can use.
You do not need to click on the Web hosting or namespace. Then hit the continue button. You will insert the captcha and then see the page.
Now we are going to work in your Power Giveaways dashboard, but keep your Facebook app window open as well.
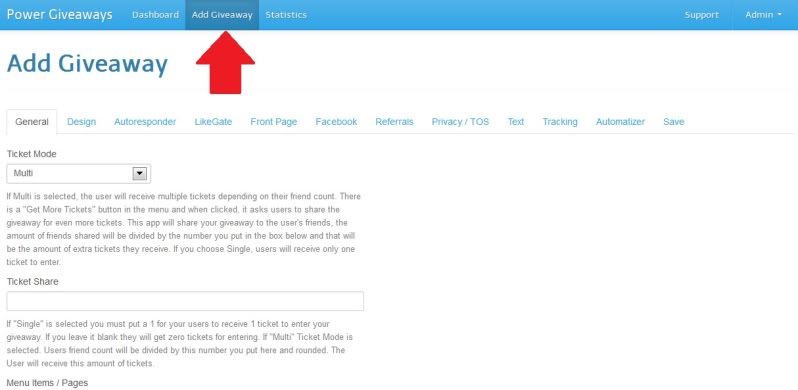
Sign on and you will see your dashboard as in the picture below.
First you will want to click on the “Add a Giveaway” tab at the top (see the arrow).
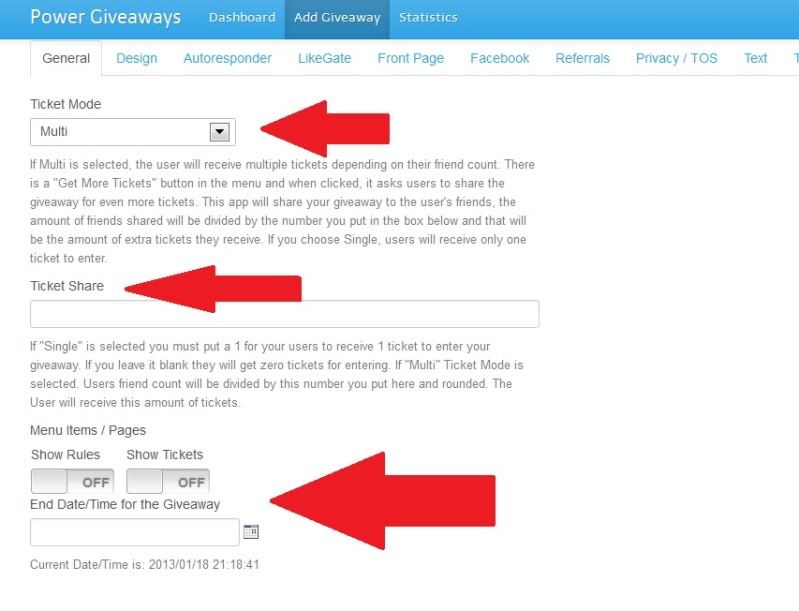
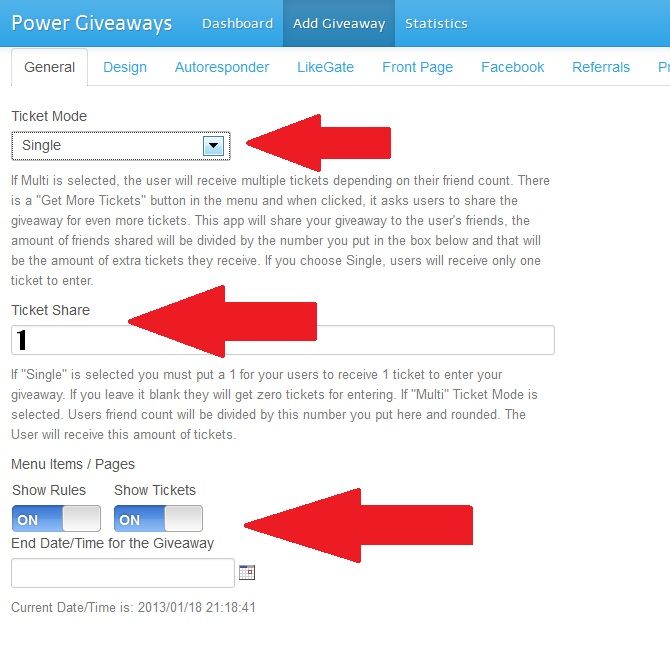
To set up a NEW Giveaway you will start in the “General Tab” which is the first tab under Add Giveaway Tab.
You have two options you can use for your fans to get tickets (entries) for the giveaway.
First option is called Multi– this option when turned on will allow you to add as many tickets (entries) that you want which will get shared on the amount of friends that user or fan has. So if they have less friends they will receive less entries per person that enters the giveaway. You add the amount of tickets you want them to share among the friends that enter your giveaway. It’s not really fair option to all users.
Your other option is to click on Single– this option will allow you to assign each user a certain number like 1. When the get tickets option is on, then that user can invite their friends for the same amount of entries when they enter your giveaway. So if you assign (ONE) ticket/entry, then the user gets one and each friend receives one entry. This is a fair option for all users.
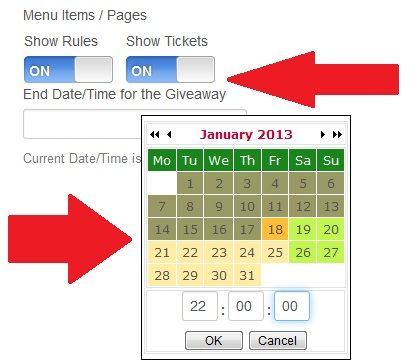
You can turn on “Show Rules” and “Show Tickets” so your fans can see both when they enter the giveaway.
You can will also click on the End Date/Time for the Giveaway pictured above. The time is set in Mountain Standard Time.
For example if you want to end your giveaway at midnight (12am) EST then you will use this schedule as follows to set it in MST:
12 AM EST => 11 PM CST => 10 PM MST => 9 PM PST. *NOTE: Giveaways are set in military time so the ending time would be 22:00 PM MST
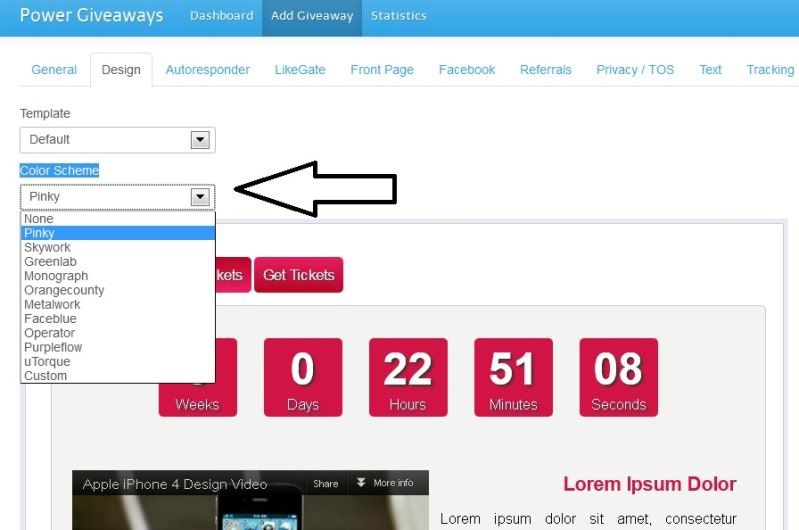
The Design Tab
You can change the color scheme of your countdown and choose from several colors. You can click on custom if you want create a custom color.
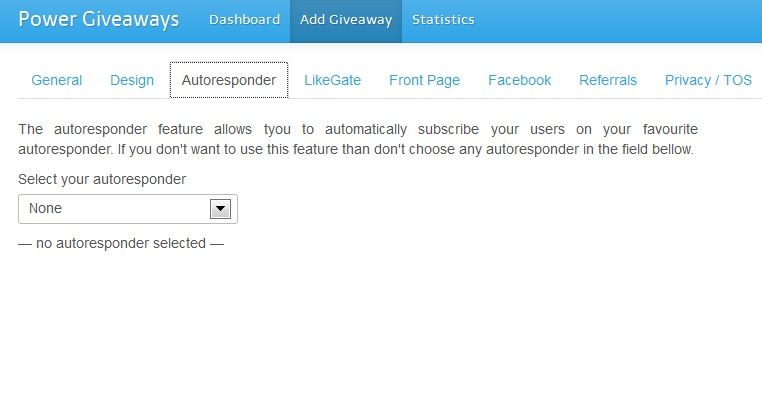
The Autoresponder Tab
Leave this one blank for now. Myles can better explain what this feature does.
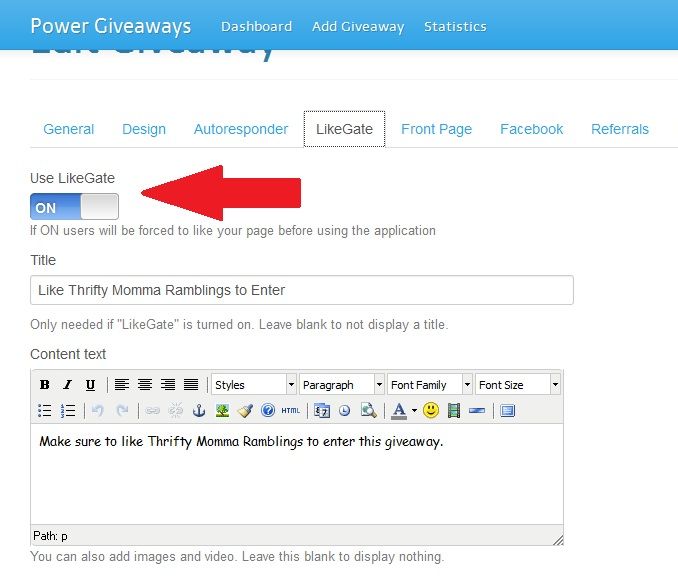
LikeGate
This is the feature that ensures the users are fans in order to enter your giveaway. You are not making it mandatory to like them, because they cannot enter unless they are a fan. It is Facebook compliant. As you can see in the picture below, you will want to turn on the LikeGate and you can title it however you like, but this how I set mine up. You can also edit the text and add pictures if you would like.
Front Page Tab
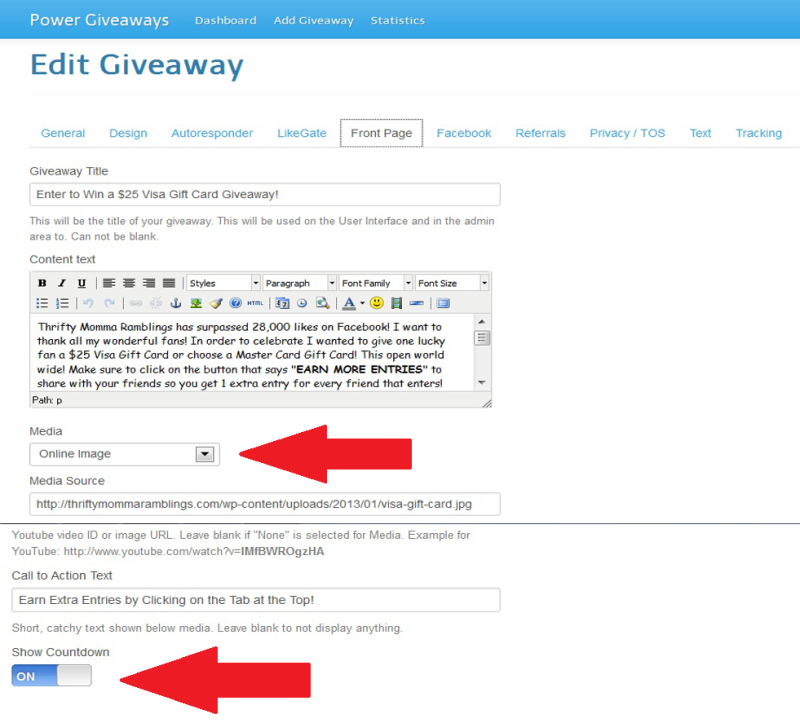
You will edit the front page for the giveaway here. The front page is also considered your landing page. You can choose to add an image or video for the main picture. You will not upload the picture to this application. So you need to use a URL which can be done with photo bucket or uploading media to your blog. I turn the countdown on so my fans can see how much time is left. You will add the rules of the giveaway here and it will be similar to what you add to your Rafflecopter form.
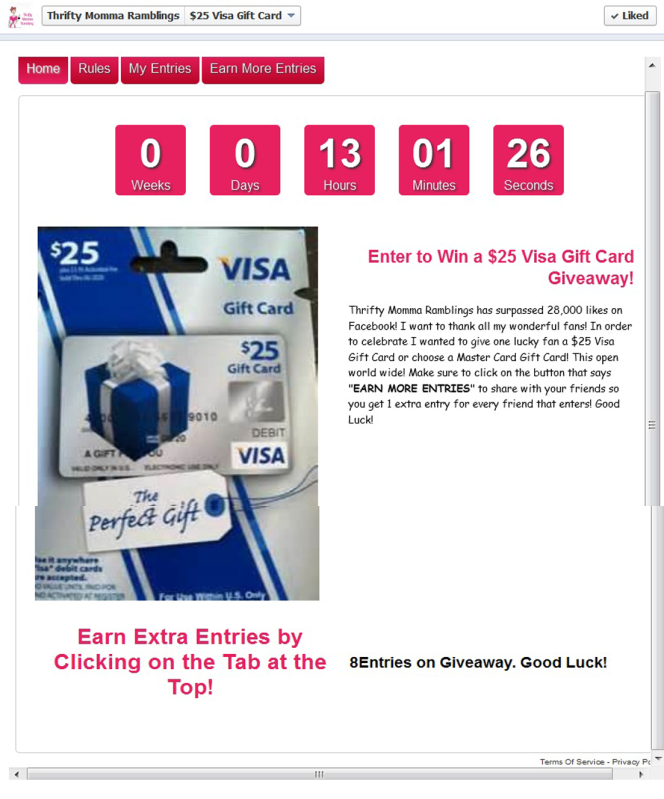
The picture below is what it will look like after you edit your front page.
Facebook Tab
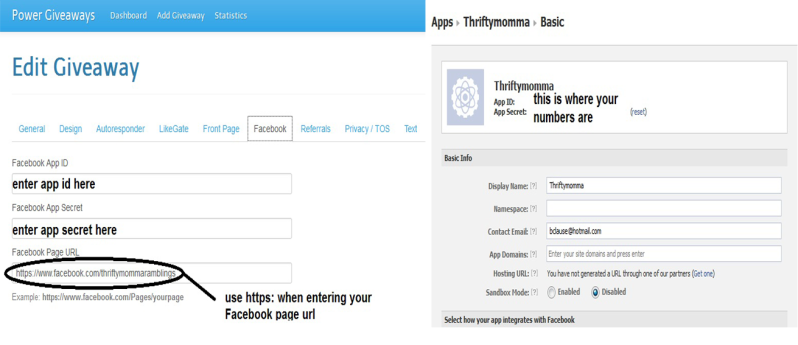
Now you need to have both your Power Giveaway dashboard open and your Facebook developer app open (the one you just created). In your power giveaway dashboard you will put your app id where it says and same thing for app secret id. Also put your facebook url but make sure you enter https
Referrals Tab
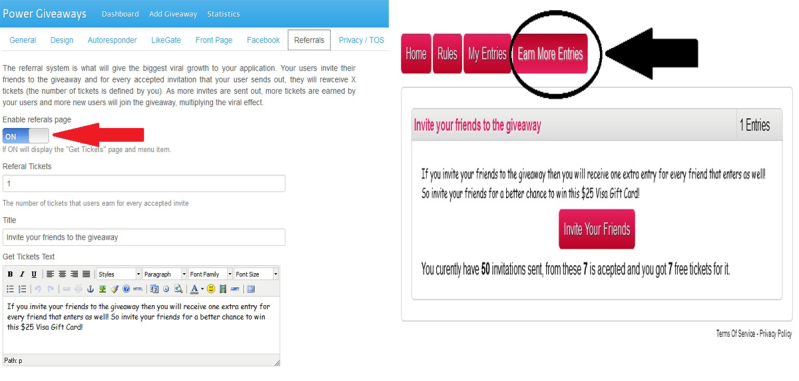
This is used to encourage users to invite their friends. You will turn it on in your dashboard as you want to encourage them to invite their friends to the giveaway. They only get the extra entries if their friends enter. If I invite 10 friends, but only 6 enter, then I will only get 6 extra entries. Each user can invite a maximum of 50 friends. The second picture is what it looks like when it is turned on and the giveaway is live.
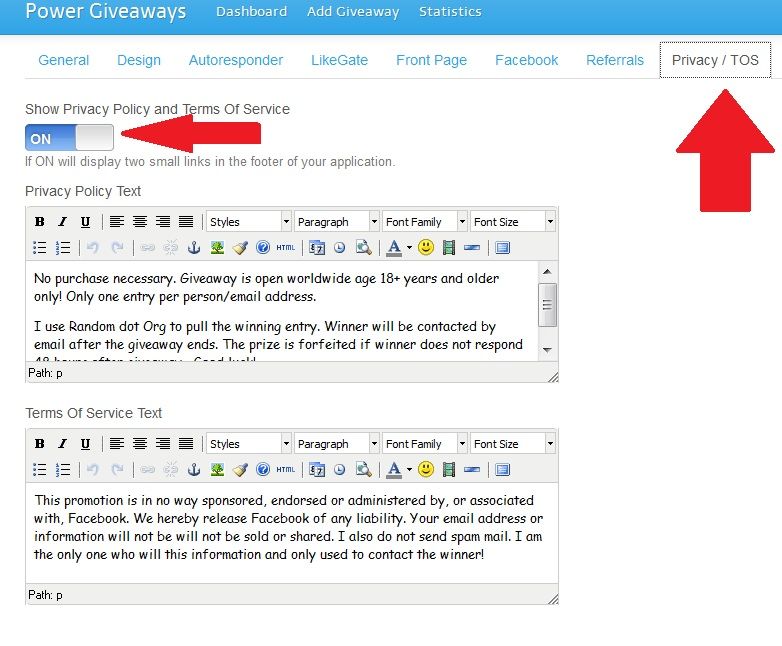
Privacy/TOS (Terms of Service)
This is for disclosures and privacy which is similar to the wording many of us use for Rafflecopter.
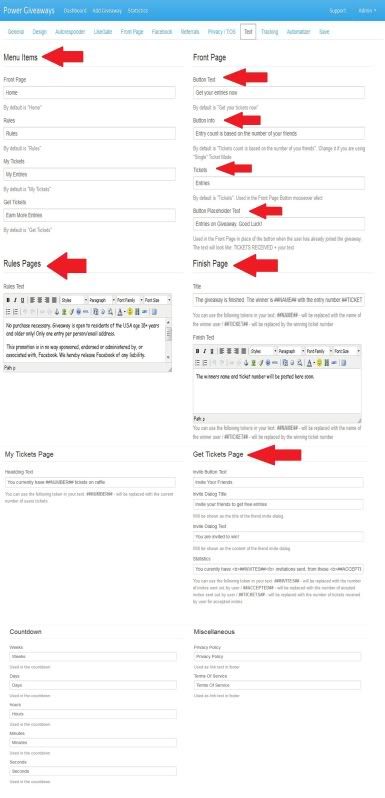
Text Tab
This allows you to change EVERY piece of text. I changed “Ticket” to “Entry” and lottery to Giveaway as my fans are more familiar with these terms. The ticket is set as default but after your first giveaway, then you won’t have to change it again.
13. Tracking Tab – I know you can do something here with Google Analytics, but this one I’ll have to turn over to Myles too. I leave mine blank for now.
14. Automatizer – This is where you set up how many winners, the names of the prizes and winner’s email.
I leave mine off, because I have not had a successful email yet, that will be tested again tonight when my nothing giveaway ends. I *think* it has to do with the Autoresponder tab. Anyways, I’d rather pick the winner than have it pick automatically at the end.
This is for the winner’s email.
Save Tab
Once you have everything the way you want it then make sure to hit SAVE!
You have successfully set up your first giveaway! Now it’s time to get the links for Facebook Developer app you created.
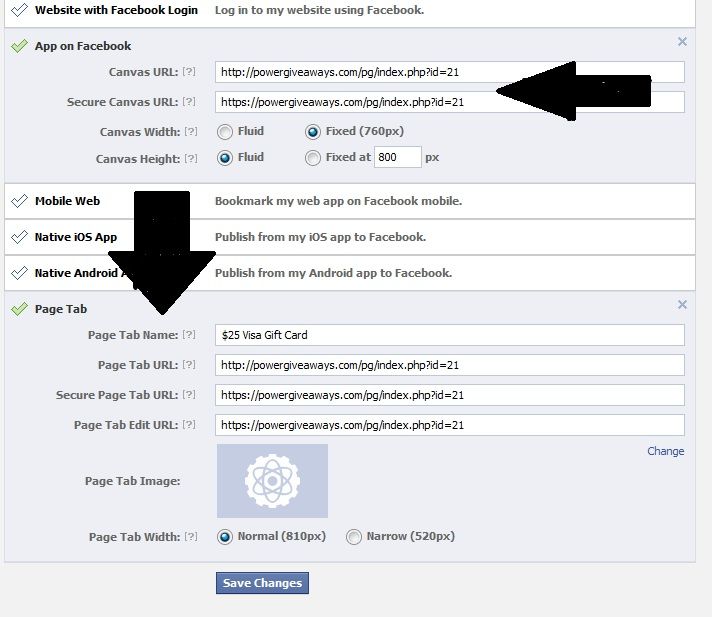
First you need to have both your power giveaway dashboard and facebook app screen both open! (https://developers.facebook.com/apps – edit)
Paste the first URL into Canvas URL and the second link into Secure Canvas URL (they are not the same URL, one is http and the other is https)
Paste the third URL in Page Tab URL and the fourth link into BOTH Secure Page Tab URL and Page Tab Edit URL.
This is also where you can name your giveaway (“Win a $25 Visa Gift Card”) in Page Tab Name. You can also upload an image for the box.
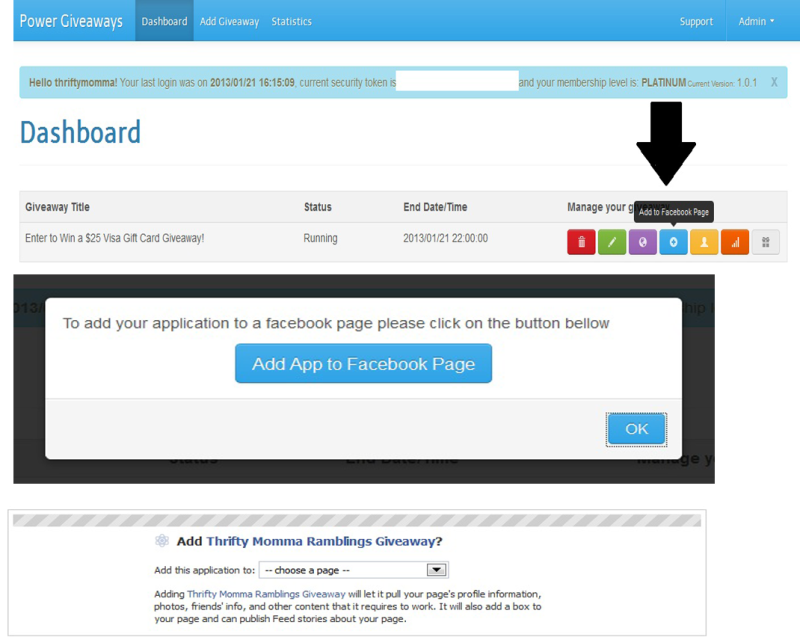
17. Now you are back in your dashboard for power giveaway. You will want to add to your Facebook page. This only has to be done one time, and you can skip for any future giveaways you create.
In the third picture you will see choose a page so choose the page you want to post the app onto.
*NOTE: If you have more than one fan page and you want to add the app to both pages then you can run the same giveaway on both pages! (the entries from both pages will be accepted). If you want to run two different giveaways, you need to go back to step one and make another app (for example call one Coupon Nurse and one Freebie Corner, etc)
18. Then you will hit “save changes” at the bottom of the facebook page.
19. Now you will actually add your created giveaway to your Facebook fan page.
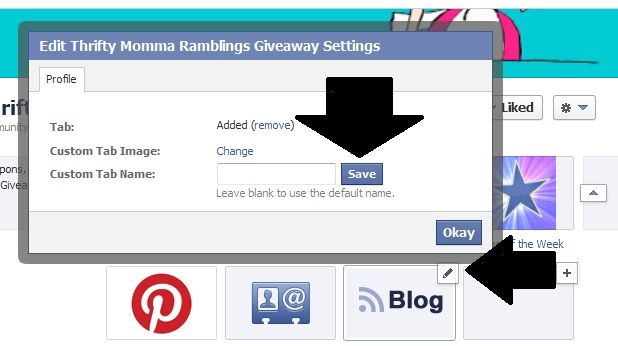
From your fan page, click on the upside down triangle near where your other apps are located as in the picture below.
Click the + button in the top right corner, and pick the giveaway app to be added.
If you hover over the right corner you will see a “pencil” icon and you can drop it down to edit
Here is where you can add the image.
If you run another giveaway you can switch the pic here. Also, you will need to repeat step #17 so that the links for the new giveaway go in.
